I didn't plan on making jam last Tuesday. I just had a carton of blueberries that needed using up and about fifteen minutes to kill. Next thing I knew, I had a jar of the most beautiful purple stuff sitting in my fridge, and breakfast hasn't been the same since. The best part? Chia seeds do all the thickening work while you stand there feeling impressive. No canning skills required.
→ It’s Ridiculously Easy: Like, if you can stir, you can make this. We’re talking 15 minutes of work, one pot, and zero canning skills required. It’s pretty much foolproof.
→ Way Better Than Store-Bought: You know what’s not in this jam? High fructose corn syrup, weird preservatives, or artificial flavors. It’s just real, honest fruit and simple ingredients you can actually pronounce.
→ It’s Actually Good for You: Thanks to those tiny chia seeds, this jam is packed with fiber, omega-3s, and antioxidants. It’s the kind of treat that tastes indulgent but secretly makes you feel pretty good about yourself.
→ Budget-Friendly Magic: A fancy artisan jam at the farmer’s market can cost you an arm and a leg. This recipe costs a fraction of that, and honestly? It tastes way fresher.
→ So Versatile It’s Not Even Funny: Slather it on toast, swirl it into yogurt, drizzle it over pancakes, or spoon it onto a cheese board. It’s the little black dress of your fridge it goes with everything.
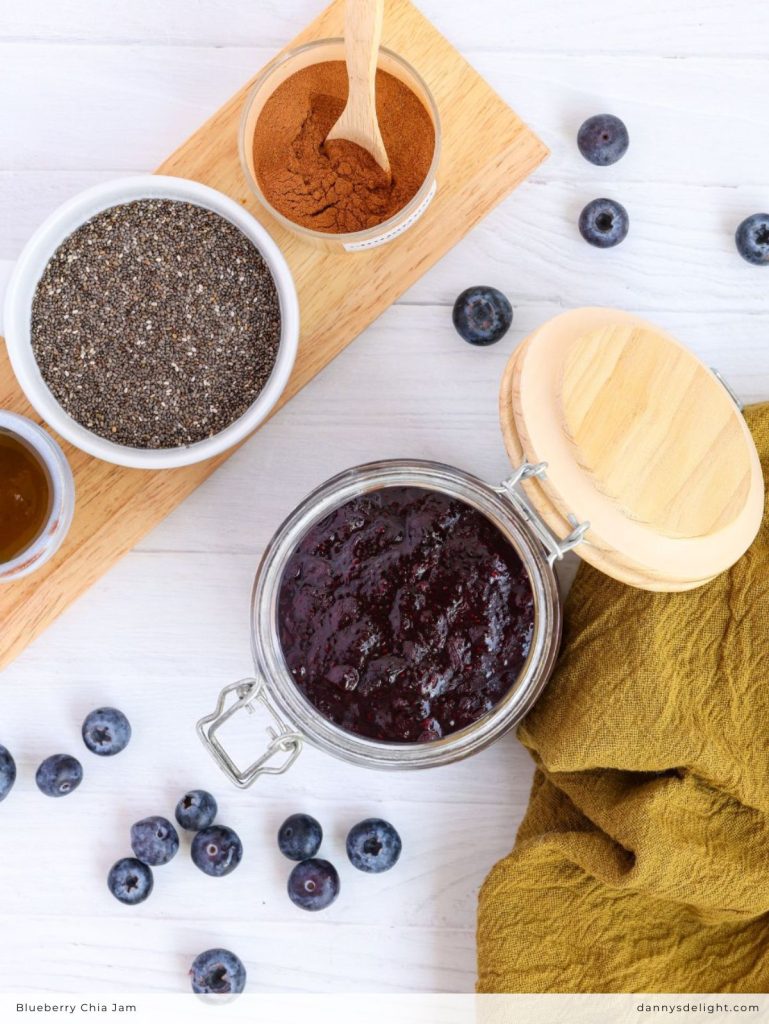
One of the things I love most about this recipe is how short and sweet the ingredient list is. You don't need any fancy boxes of pectin or mysterious additives here. Just a handful of real, wholesome foods that come together to create something magical. Let me introduce you to the lineup:
→ Fresh Blueberries: The absolute star of the show! I love using fresh blueberries when they're plump and juicy, but here's a little secret: frozen berries work perfectly too (no need to even thaw them first!). They're packed with antioxidants and that gorgeous deep purple color we're after. Every time I make this jam, my kitchen smells like a cozy berry patch, and I am totally here for it.
→ Chia Seeds: Okay, can we talk about these tiny powerhouses for a second? They might be small, but they're the real magic makers here. When they meet liquid, they form a natural gel that thickens our jam without any cooking or pectin required. Plus, they're loaded with fiber, protein, and omega-3s, which means we get to feel just a little bit fancy and healthy every time we spread this on our toast.
→ Maple Syrup: Instead of dumping in a bunch of refined sugar, I reach for good old maple syrup to sweeten the deal. It adds this warm, slightly caramel-like flavor that pairs beautifully with the blueberries. You can totally adjust the amount to your taste, but I promise, it's just enough to make things feel like a treat without going overboard.
→ Fresh Lemon Juice: This bright little splash does some serious heavy lifting! It cuts through the sweetness, wakes up all those berry flavors, and helps the jam look nice and vibrant. A little squeeze goes a long way in making everything taste fresh and zingy.
→ Ground Cinnamon & A Pinch of Salt: My dynamic duo! The cinnamon adds a whisper of cozy warmth that makes this jam feel extra special, like a big hug in a jar. And that tiny pinch of salt? It's not there to make things salty, I promise. It just makes all the other flavors pop and sing together perfectly.
NOTE: For measurements and rest of the ingredients check the recipe card below.
What You'll Need To Do
Serves: 12 Time: 15 mins
Alright, let’s get jamming! Grab a medium saucepan and toss in your blueberries, fresh lemon juice, and vanilla extract. Turn the heat to medium and let it all hang out for about 3-5 minutes. You’ll hear a gentle simmer, and the berries will start getting all soft and juicy. While they cook, gently mash them up a bit with a spoon or potato masher I like to leave some chunks for texture, but you do you!
Once the blueberries have broken down into a lovely, saucy consistency, it's time for the flavor boosters. Stir in the maple syrup, ground cinnamon, and a tiny pinch of salt. Give it a good swirl, then take the pot off the heat immediately we don’t want to overcook that deliciousness.
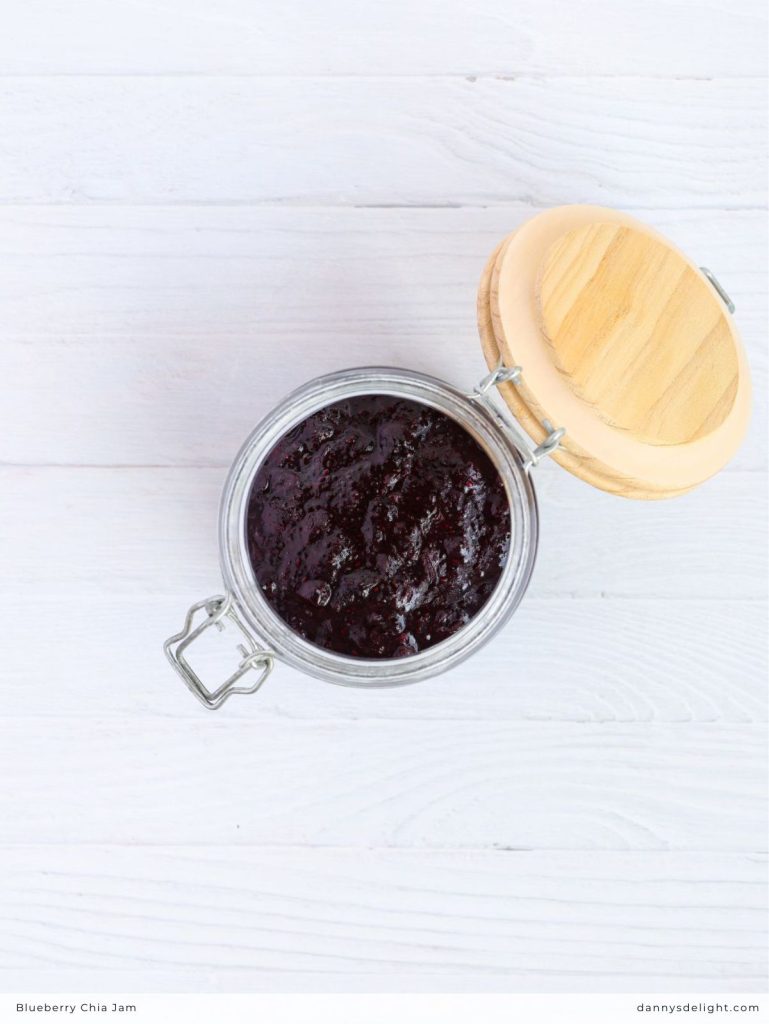
Now for the magic ingredient: chia seeds! Pour them in and stir really well. You’ll see everything start to look a little gel-like almost instantly. Carefully pour the mixture into a clean glass jar.
Let the jam hang out on the counter for a few minutes to cool down just a bit, then pop that jar into the fridge. It needs at least one hour to chill and really set up into that perfect, spreadable texture.
A quick pro-tip: If you peek in the fridge after an hour and it’s looking a little looser than you’d like (maybe you like a super thick jam), no worries! Just stir in 1-2 more teaspoons of chia seeds, let it sit on the counter for another 10-15 minutes, and it’ll thicken right up.
Per Serving (approx. 3 tablespoons)
Glycemic Load (GL): Low (approx. 4-5)
Glycemic Index (GI): Low (approx. 45-50)
Mix It Up: Fun & Easy Swap Ideas
The beautiful thing about this jam is how flexible it is! Don't feel like you have to stick to the script every single time. Here are some of my favorite ways to switch things up based on what you have in your kitchen or whatever you're craving:
1| Berry Swap: Blueberries are the classic, but honestly? Any berry works like a charm. Try strawberries, raspberries, blackberries, or a mix of all three for a "summer berry" blend. Frozen mixed berries from the grocery store are a total win here too!
2| Sweetener Swap: Maple syrup is my go-to, but honey works beautifully if that's what you have. For a low-carb or keto-friendly option, you can use a granulated monk fruit sweetener or stevia just add it slowly and taste as you go!
3| Citrus Swap: No lemon? No problem! Fresh lime juice adds a fun, slightly tangier twist that's especially amazing with strawberries or raspberries. Even a splash of orange juice works in a pinch.
4| Spice Swap: Cinnamon is lovely, but don't be afraid to play around. A pinch of nutmeg or cardamom adds a whole different vibe. For a festive fall version, try a tiny dash of pumpkin pie spice trust me, it's incredible on morning toast.
5| Extract Swap: Vanilla is a classic for a reason, but have you ever tried almond extract? Just a tiny drop (it's strong!) with your berries tastes like you're eating something straight from a fancy bakery. So good!
6| No-Chia Option: Believe it or not, if you're out of chia seeds or just not a fan, you can grind up some flaxseeds and use them the same way. They'll thicken the jam up nicely and add their own boost of healthy goodness.
Okay, so you've mastered the classic version high five! 🖐️ Now let's have some fun with it. This recipe is basically a blank canvas, and there are so many cool ways to tweak it depending on the season, your mood, or what you're planning to serve with it. Here are some of my favorite remixes:
1| Lemon Basil Bliss: This one sounds fancy but is so simple! After you take the jam off the heat, stir in a handful of fresh basil leaves that have been thinly sliced (chiffonade, if we're getting fancy!). Let them steep while the jam cools, then fish them out or leave them in your call. The combination of blueberry, lemon, and basil is chef's kiss on a bagel with cream cheese.
2| Spiced Apple Cider Twist: For a cozy fall vibe, swap the lemon juice for apple cider and add an extra pinch of cinnamon along with a tiny dash of cloves or allspice. It tastes like autumn in a jar and is incredible drizzled over pancakes or waffles.
3| Balsamic Black Pepper Jam: Okay, don't run away this one is a grown-up delight! Stir in a teaspoon of good balsamic vinegar and a generous crack of fresh black pepper right at the end. It sounds wild, but the tangy, peppery kick is absolutely divine on a cheese board with sharp cheddar or goat cheese.
4| Ginger Zing: Love a little warmth? Add a teaspoon of freshly grated ginger (or half a teaspoon of dried ginger) along with the cinnamon. It adds this lovely, subtle kick that's amazing swirled into oatmeal or spread on warm scones.
5| Vanilla Bean Upgrade: If you're feeling extra luxurious, swap out the vanilla extract for the seeds scraped from half a vanilla bean. Those little black specks make the jam look gorgeous and taste incredibly rich and aromatic. Fancy brunch, anyone?
6| Tropical Getaway: Use frozen mango and pineapple instead of blueberries, swap the lemon for lime, and keep the vanilla. You'll end up with a tropical chia jam that tastes like sunshine and is perfect for stirring into yogurt or spooning over pound cake.
7| Boozy Touch (For the Grown-Ups): For a fun adult twist, stir in a tablespoon of bourbon, dark rum, or Grand Marnier right after you take the jam off the heat. It adds so much warmth and complexity. Pro tip: This makes an amazing homemade gift for the foodie friends in your life!
After making this recipe approximately one million times (okay, maybe a slight exaggeration), I've picked up a few little tricks along the way. These aren't rules, just friendly advice to help your jam turn out absolutely perfect every single time!
1| Don't Skip the Mash: I know it's tempting to just let the blueberries bubble away on their own, but taking a few minutes to mash them while they cook makes a huge difference. It releases all that beautiful juice and helps create that perfect, spreadable texture. I like to leave some berries partially whole for little bursts of fruit, but mash away if you like yours smooth!
2| Patience Is Your Friend: The hardest part of this whole recipe? Waiting for the jam to chill! I know you'll want to dive right in (I always do), but letting it sit in the fridge for at least an hour is crucial. The chia seeds need time to do their magic and fully thicken everything up. Trust the process, I promise it's worth it!
3| The Spoon Test: Curious if your jam is thick enough before it goes in the fridge? Grab a spoon and dip it in cold water, then scoop up a little jam and let it sit for a minute. If it coats the spoon nicely and doesn't run right off, you're in good shape. If it's still super runny, stir in another teaspoon of chia seeds.
4| Jar Game Strong: Any glass jar works beautifully here! I love reusing old jelly jars or pasta sauce jars (just make sure they're thoroughly washed and dried). There's something so satisfying about giving a second life to a jar, and it makes your jam look extra cute in the fridge.
5| Taste As You Go: Everybody's sweetness preference is a little different, and berries can vary wildly in how sweet or tart they are. Give your mixture a little taste before you add the chia seeds. Want it sweeter? Add a tiny splash more maple syrup. Love it tangy? A little extra lemon juice does the trick!
6| Thicker or Thinner? You Decide: Love a thick, spoonable jam that holds its shape on toast? Stick to the recipe as written. Prefer something a little runnier that's perfect for drizzling over pancakes or ice cream? Cut back to just 2 tablespoons of chia seeds and thank me later.
Save Money & Still Make Amazing Jam: My Best Budget Tips
Listen, I'm all about eating well without breaking the bank. This recipe is already pretty easy on the wallet, but I've discovered a few tricks over the years that make it even more affordable. Here's how to get the most jam for your hard-earned cash!
1| Frozen Berries Are Your BFF: Seriously, don't sleep on the freezer aisle! Frozen blueberries are almost always cheaper than fresh, especially when berries aren't in season. They're picked at peak ripeness and work perfectly here no need to even thaw them first. Stock up when they're on sale and you'll always be ready for jam emergencies.
2| Hit Up the Farmers Market at the End: If you love fresh berries, try swinging by your local farmers market right before closing time. Vendors often discount their remaining produce because they don't want to pack it back up. You can score some seriously gorgeous berries for a fraction of the morning price!
3| Buy Chia Seeds in Bulk: Those tiny little packages of chia seeds at the grocery store can be surprisingly pricey. Check out the bulk bins at health food stores or buy a bigger bag online or at a warehouse club. You'll pay way less per ounce, and they keep for ages in the pantry.
4| Grow Your Own Mint or Basil: Okay, this one's a long game, but hear me out! A single herb plant costs about the same as a bundle of fresh herbs at the store, but it keeps on giving all season long. Snip some fresh mint or basil for those fancy jam twists without spending another dime.
5| Repurpose Jars You Already Own: Don't go out and buy fancy new mason jars! Start saving your pasta sauce jars, pickle jars, or anything else with a lid. Give 'em a good wash with hot soapy water, and you've got the cutest, most eco-friendly jam containers money can buy. Free is my favorite price!
6| Shop Your Pantry First: Before you head to the store, take a quick peek at what you already have. Got honey instead of maple syrup? Perfect. Found some random spices in the back? Use 'em up! You might be surprised how often you already have everything you need.
7| Pick Your Own in Season: If you live anywhere near a pick-your-own berry farm, this is a total game-changer. It's a fun little adventure, and you usually pay way less than store prices. Spend a morning in the sun, come home with buckets of berries, and spend the afternoon jamming away. Doesn't get much better than that!
8| Make It Stretch: A little goes a long way with this jam! Because it's so flavorful and satisfying, you can use a thinner layer than you would with store-bought stuff. That jar of homemade goodness will last even longer, which means more bang for your buck.
Okay, so you've made this gorgeous jar of blueberry goodness. Now what? I mean, obviously, toast is a classic and will never let you down. But trust me, this jam is way more versatile than you think! Here are some of my favorite ways to use it up if it even lasts that long in your house.
✔ The Classic Toast Situation: Let's start with the obvious because it's just too good. Slather it on warm sourdough, a crispy baguette, or even a simple piece of whole wheat. Want to get fancy? Spread some ricotta or cream cheese on the toast first, then pile on the jam. Sweet, creamy, tangy absolute perfection.
✔ Yogurt Bowl Upgrade: Stir a big spoonful into a bowl of plain Greek yogurt, add some granola and fresh fruit, and suddenly breakfast feels like a fancy café situation. It's also amazing swirled into overnight oats or mixed into a parfait. Breakfast just got a serious glow-up.
✔ Peanut Butter's New Best Friend: Peanut butter and jelly sandwiches are a childhood classic for a reason, but have you tried it with this jam? The natural sweetness and real fruit flavor take it to a whole new level. It's also incredible with almond butter, cashew butter, or even sunflower seed butter.
✔ Pancake and Waffle Drizzle: Warm up a few spoonfuls in the microwave for just a few seconds and drizzle it over pancakes, waffles, or French toast. It's like syrup's cooler, fruitier cousin. Sunday brunch will never be the same!
✔ Cheese Board Magic: This one might surprise you, but jam and cheese are a match made in heaven. Put out a little bowl of this blueberry chia jam next to a sharp cheddar, a creamy brie, or some tangy goat cheese. Add some crackers and nuts, and you've got the fanciest snack board with almost zero effort.
✔ Ice Cream Topping: Store-bought ice cream is great, but store-bought ice cream with a swirl of homemade jam on top? Next level. The slight tanginess of the berries cuts through the richness perfectly. Vanilla bean is my favorite, but honestly, any flavor works!
✔ Oatmeal Swirl: Cook up your morning oatmeal, then swirl in a big spoonful of jam right before you eat. It adds sweetness, fruitiness, and pretty purple swirls. Way better than brown sugar, and it feels like a warm hug in a bowl.
✔ Thumbprint Cookies Shortcut: Feeling like a baker? Grab some store-bought shortbread or sugar cookie dough, roll it into balls, flatten them, and press your thumb in the center. Fill each little divot with a teaspoon of jam and bake according to the package directions. Everyone will think you spent all day baking!
✔ Layer It in a Parfait: Grab a clear glass or a mason jar and start layering: yogurt, jam, granola, yogurt, jam, granola, maybe some fresh berries on top. It looks absolutely stunning and tastes just as good. Perfect for when you have company or just want to treat yourself.
✔ Spread on Muffins or Scones: Warm muffins or scones fresh from the oven? Slice them open and smear a little of this jam inside. The heat melts it just slightly, and honestly, it's one of life's simplest and greatest pleasures.
You made the jam, you admired the jam, and now you're wondering how to keep it tasting amazing for as long as possible. I've got you covered! Proper storage is super easy, but there are a few little tricks that make a big difference. Here's everything I've learned about keeping that jar of blueberry goodness fresh and delicious.
✔ The Fridge Is Your Friend: This jam doesn't have all the preservatives and weird stuff that store-bought jams have, so it likes to stay cool. Pop that jar in the refrigerator, and it'll be happy there for up to two weeks. Just make sure the lid is on tight so it doesn't absorb any funky fridge smells.
✔ Cool Down First, Please: I know it's tempting to stick that warm jar straight into the fridge, but try to resist! Let it cool to room temperature on the counter first (about 30 minutes or so). If you put hot glass in the fridge, it can mess with the temperature inside and even risk cracking the jar. Plus, it gives the chia seeds a little extra time to work their magic.
✔ Jar Choice Matters: Glass is definitely the way to go here. Mason jars are perfect, but honestly, any clean glass jar with a tight-fitting lid works great. I love reusing pasta sauce jars or pickle jars just make sure you wash them really, really well so your jam doesn't taste like last month's spaghetti night!
✔ The Clean Spoon Rule: This one is important, I promise! Always use a clean, dry spoon when you're scooping out some jam. If you dip in a dirty spoon or one with crumbs from your toast, you're introducing bacteria that can make your jam go bad way faster. Keep it clean, keep it tasty!
✔ Freeze for Later: Did you make a double batch? Smart move! This jam freezes beautifully for up to three months. Just leave about an inch of space at the top of your jar or freezer container because the jam will expand a little as it freezes. When you're ready for more, thaw it overnight in the fridge and give it a good stir.
✔ Canning Is Optional: This recipe is for refrigerator jam, which means it's not designed for long-term shelf-stable canning like Grandma used to do. If you know all about water bath canning and want to go that route, you can definitely look into it, but for us everyday folks, the fridge or freezer method is simple, safe, and delicious.
✔ Separation Station: Don't panic if you open the fridge the next day and see a little liquid separated on top! This happens sometimes, especially if you're using super juicy berries. Just give it a good stir and it'll come right back together. No worries at all.
✔ How to Tell If It's Still Good: Your senses are the best tools here! If the jam smells funky, looks moldy (yuck!), or tastes off in any way, it's time to say goodbye and make a fresh batch. But honestly, in my house, it never lasts long enough to go bad. We eat it way too fast for that!
And that's all there is to it! Fifteen minutes, one pot, and you're suddenly someone who makes their own jam. I've been putting this stuff on everything all week and zero regrets so far. Give it a shot and let me know how it goes. Now if you'll excuse me, I have a date with a spoon and the last few bites of this jar. Happy cooking
Looking for the easiest jam you'll ever make? 🫐 My 15-minute Blueberry Chia Jam is about to become your new obsession! I'm ditching the refined sugar and pectin for simple, wholesome ingredients like fresh blueberries, maple syrup, and tiny chia seeds. It's perfectly sweet, beautifully thick, and way better than anything you'd buy at the store. Whether you're spreading it on morning toast, swirling it into yogurt, or gifting a jar to a friend, this little recipe is pure magic. Trust me, if you can stir a pot, you can totally nail this one! 🙌
Ingredients
15.9oz blueberries (450g)
2tbsp maple syrup (30ml)
1tbsp fresh lemon juice (15ml)
1/2tsp vanilla extract (2.5ml)
3tbsp chia seeds (30g)
Instructions
1
Cook the Berries:
In a medium-sized saucepan, combine the fresh or frozen blueberries, freshly squeezed lemon juice, and vanilla extract. Place the saucepan over medium heat and bring the mixture to a gentle simmer. Cook for 3 to 5 minutes, stirring frequently to prevent sticking. As the blueberries soften, use the back of a spoon or a potato masher to gently crush them to your desired consistency.
2
Incorporate Sweeteners:
Once the blueberries have broken down, remove the saucepan from the heat. Immediately stir in the maple syrup, ground cinnamon, and a small pinch of salt until fully combined.
3
Add Thickening Agent:
Add the chia seeds to the warm berry mixture and stir vigorously for approximately 30 to 60 seconds. This ensures the seeds are evenly distributed and helps prevent clumping as they begin to gel.
4
Transfer to Container:
Carefully pour the jam into a clean, sterilized 16-oz (480ml) glass jar or a similar airtight container.
5
Chill to Set:
Allow the jam to cool to room temperature before sealing the container. Then, transfer it to the refrigerator and chill for a minimum of one hour. This resting period allows the chia seeds to fully hydrate and the jam to achieve its final spreadable consistency.
6
Adjust Consistency (If Necessary):
After chilling, if the jam has not reached the desired thickness, stir in an additional 1 to 2 teaspoons of chia seeds. Allow the jam to stand at room temperature for 10 to 15 minutes, then return it to the refrigerator to continue setting.
7
Yield:
This recipe produces approximately 16.2 fl oz (480ml) of jam. A standard serving size is approximately 3 tablespoons.
Nutrition Facts
Servings 12
Amount Per Serving
Calories41kcal
% Daily Value *
Total Fat1g2%
Total Carbohydrate7g3%
Protein1g2%
* Percent Daily Values are based on a 2,000 calorie diet. Your daily value may be higher or lower depending on your calorie needs.
Keywords:
blueberry chia jam, easy chia jam recipe, homemade jam without pectin, healthy blueberry jam, 15 minute jam recipe, chia seed jam, sugar free jam recipe, how to make blueberry jam, low sugar jam, clean eating breakfast, vegan jam recipe, paleo blueberry jam, keto friendly jam, refrigerator jam, no cook jam alternative, fresh blueberry recipes, easy homemade gifts, healthy breakfast ideas, simple fruit preserves, thick jam with chia seeds
Did you like this recipe?
Pin this recipe and share it with your followers.
Danny Davis
A Food Blogger
Hi, I'm Danny, the food lover and creator of this recipe blog. I aim to spark your culinary creativity with approachable recipes for all skill levels. Come join me in exploring delicious flavors and making memorable dishes together in my kitchen!