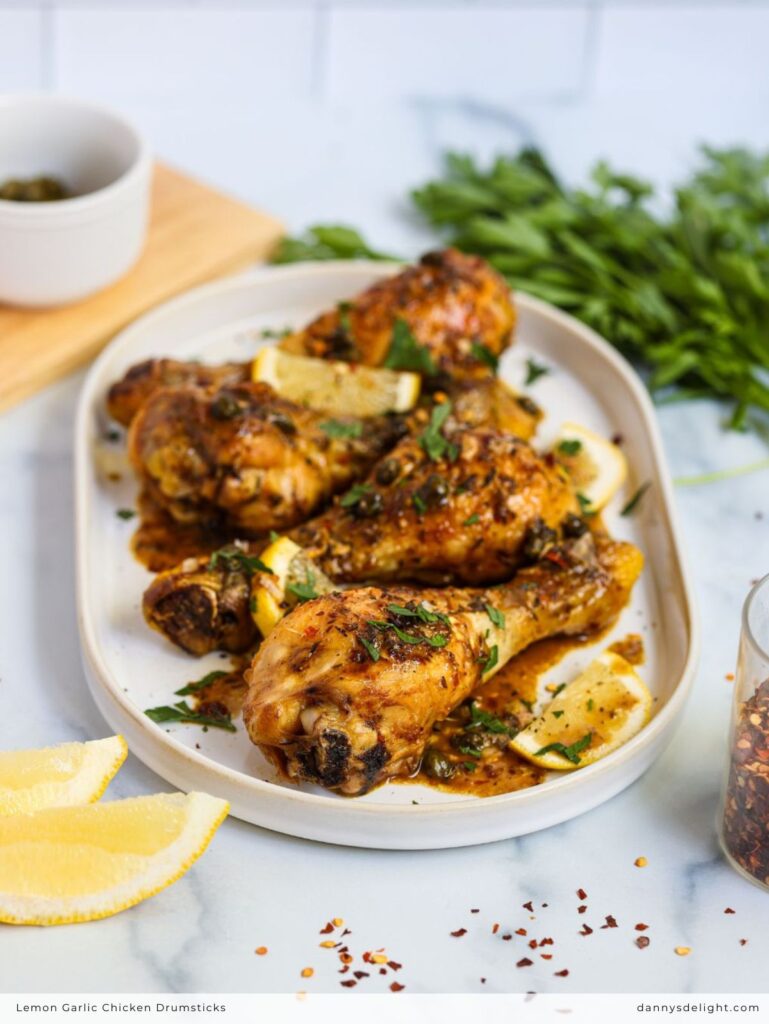
If you’re looking for a dinner that tastes like you spent hours in the kitchen, but secretly comes together with barely any effort, you’ve landed in the right spot. This isn't just another baked chicken recipe it’s my go-to, one-pan wonder that never fails to impress. We’re talking juicy drumsticks with crackling-crisp skin, all smothered in a buttery, briny, lemon-garlic sauce that you’ll want to eat with a spoon. Trust me, your regular weeknight rotation is about to get a major upgrade.
Think of this as your new go-to, no-fuss, flavor-packed hero. Here’s why it’s about to become a regular on your table:
→ Crazy Flavor, Minimal Fuss. We get restaurant-level taste (think juicy chicken, crispy skin, and a velvety, zesty sauce) from just one pan and a handful of pantry staples. It feels fancy without the fancy effort.
→ The Sauce is a Game-Changer. That quick pan sauce you make after baking? It’s the secret star. Buttery, briny from the capers, with a little garlicky zing you’ll want to put it on everything. Spoon it generously!
→ Kind to Your Wallet. Chicken drumsticks are the ultimate budget-friendly cut, but they taste like a million bucks here. It’s a satisfying, protein-packed meal that feeds a family without stretching your grocery budget.
→ Meal Prep Friendly. The marinating step is your secret weapon for busy nights. Season them the morning of (or even the night before), and when it's time to cook, you’re already halfway done. The flavor does the work while you’re out living your life.
→ Comfort Food, Upgraded. It’s got all the cozy, satisfying vibes of a classic roasted chicken dinner, but the bright lemon and punchy capers keep it feeling fresh and interesting not heavy or boring.
In short: It’s easy, affordable, deeply delicious, and just a really dependable recipe to have in your back pocket. You can’t go wrong
Okay, let's geek out for just a sec on a few of the ingredients that make this dish so darn good. You don't need anything fancy, but each one plays a special role:
→ The Chicken Drumsticks: The humble, affordable hero! They're perfect here because the bone keeps them incredibly juicy during the long bake, and that skin? It crisps up like a dream. It’s hard to mess up a drumstick.
→ The Garlic Cloves: We’re using whole, peeled cloves. They mellow and sweeten as they cook in the sauce, turning into little creamy flavor bombs you can smoosh onto your chicken or bread. So much better than minced here!
→ The Capers: Don't skip 'em! These little briny pops are the secret weapon. They cut through the richness of the butter and add a bright, salty tang that makes the whole dish taste more expensive and complex.
→ The Cold Butter: This is the magic trick for a luxurious, velvety sauce. Whisking in cold butter cubes at the very end (chefs call this "mounting" the sauce) thickens it slightly and gives it a gorgeous, glossy finish and rich flavor you just can't get from oil.
See? Simple stuff, working together to create something truly special. Now, let's get cooking!
NOTE: For measurements and rest of the ingredients check the recipe card below.
What You'll Need To Do
Time required: 40 mins Serves: 6
Let's Make This Chicken!
1. Plan Ahead (The Only Patient Part): Give your drumsticks a good sprinkle with the salt and pepper. Pop them on a plate, cover, and let them hang out in the fridge for at least 4 hours (or up to a day). This is the secret handshake for super flavorful, juicy chicken!
2. Sear & Sizzle: When you're ready to cook, take the chicken out of the fridge and pat it dry with a paper towel (this is key for crispy skin!). Preheat your oven to 350°F.
Grab a large, oven-safe pan and heat the olive oil over medium heat. Carefully place the chicken in, skin-side down. Let it sizzle away without moving it for about 10 minutes, until that skin is gorgeously golden and crispy. Flip them and just sear the other side for a minute or two, then move the chicken to a clean plate.
3. Build the Flavor: See all those delicious browned bits in the pan? That's liquid gold! Pour out all but about 1 tablespoon of the oil. Toss in your whole garlic cloves and let them get fragrant for about a minute.
Now, pour in your chicken stock it will hiss and steam wonderfully. Use your spoon to scrape up all those tasty browned bits from the bottom of the pan (this is called deglazing, and it's where the magic sauce begins!). Stir in the oregano, thyme, red pepper flakes, and lemon juice.
4. Oven Time: Nestle the chicken back into the pan, skin-side up. Cover the pan (with a lid or tightly with foil) and slide it into your preheated oven. Bake for 20-30 minutes, until the chicken is cooked through (an internal thermometer should read 165°F).
5. Sauce Magic: Carefully remove the pan from the oven (handle = HOT!). Transfer the chicken to a serving platter, leaving the gorgeous juices behind.
Put the pan back on the stove over low heat. Throw in the capers. Now, take your cold butter cubes and whisk them in a few at a time, letting each little bit melt into the sauce before adding the next. You'll see the sauce turn velvety and glorious that's the butter emulsifying and making everything delicious.
6. Feast! Either return the chicken to the pan to bathe in that sauce, or simply pour the sauce right over the chicken on your platter. A final sprinkle of fresh parsley makes it pretty. Serve immediately and get ready for the compliments!
Cook's Tip: Those "browned bits" you scrape up when you add the stock? That's flavor central! It's the quick, easy way to build a restaurant-quality sauce right in your pan.
Glycemic Information (Approximate per Serving):
Glycemic Index (GI):~0 (Very Low)
Reasoning: The recipe contains no significant sources of carbohydrates (like grains, potatoes, or sugars). The minimal carbs present come from trace amounts in garlic, lemon juice, and capers, which have a negligible effect on blood sugar.
Glycemic Load (GL):~0 (Very Low)
Reasoning: Glycemic Load accounts for both the GI and the amount of carbs per serving. With total carbohydrates estimated at only 2-3 grams per serving, the GL is effectively zero.
Easy Ingredient Swaps & Ideas
No capers? Allergic to dairy? Want to use thighs? No problem! This recipe is super flexible. Here are some easy swaps to make it work for you.
For the Protein:
Chicken Thighs: An excellent 1:1 swap! Bone-in, skin-on thighs will give you a similar cooking time and even more juicy, dark meat flavor.
Chicken Breasts: Use boneless, skinless breasts. Important: Reduce the bake time to 15-20 minutes to avoid drying out, and start checking for doneness (165°F) early.
Vegetarian/Pescatarian: Try this method with chickpeas or white beans (cannellini or great northern). Sear them briefly, then build the sauce and bake for just 15 minutes to let flavors meld. For a pescatarian option, thick white fish fillets (like cod or halibut) work beautifully with a shorter 10-12 minute bake.
For the Capers & Acid:
Instead of Capers: Use chopped green olives (like Castelvetrano) or sliced pepperoncini for a similar briny punch.
Instead of Lemon Juice: An equal amount of white wine vinegar or red wine vinegar works in a pinch. For a sweeter note, try fresh orange juice.
For the Herbs & Spices:
Instead of Oregano/Thyme: Use Italian seasoning, herbes de Provence, or 1 tsp of chopped fresh rosemary.
For More Heat: Increase the red pepper flakes, or add a few dashes of hot sauce or a spoonful of 'nduja or harissa paste to the sauce.
For the Butter (Dairy-Free):
A great non-dairy swap is 2-3 tbsp of extra virgin olive oil. Whisk it in at the end just like the butter for richness.
A splash (2-3 tbsp) of full-fat canned coconut milk will also create a creamy, lush sauce.
Bonus Flavor Boosters:
Umami Kick: Add a tablespoon of tomato paste when you sauté the garlic, or toss in a couple of anchovy fillets to melt into the oil at the start.
Veggie-Packed: Throw in a handful of spinach or chopped kale at the very end of making the sauce, letting it just wilt. For heartier veggies, add quartered mushrooms or sliced onions to the pan when you sauté the garlic.
Remember: The core formula is sear → deglaze → braise → finish sauce. As long as you follow that, you can get creative with what you toss in the pan!
Stick to the same sear-braise-sauce steps, but swap these ingredients to travel the world from your kitchen.
1| Lemon & Artichoke: Swap capers for a drained 14oz can of quartered artichoke hearts. Add them with the garlic. Use fresh dill instead of parsley for garnish. Tastes like a sunny Mediterranean bistro.
2| Sun-Dried Tomato & Basil: Add ¼ cup chopped oil-packed sun-dried tomatoes and 1 tsp dried basil with the herbs. Use dry white wine instead of half the chicken stock. Garnish with fresh basil. Pure Italian summer vibes.
3| Spanish Paprika & Olive: Use smoked paprika instead of red pepper flakes and oregano. Add ½ cup mixed green & Kalamata olives with the capers. Rich, smoky, and incredibly savory.
4| Creamy Dijon & Tarragon: Whisk 2 tbsp of Dijon mustard and ½ cup of heavy cream into the sauce after baking, before adding the butter. Use fresh tarragon (or a pinch dried) instead of thyme. Elegant, French-inspired, and luxuriously creamy.
Fun Twists on the Formula
1| "Everything" Crispy Topping: Before baking, sprinkle the seared chicken with everything bagel seasoning for an addictively crunchy, savory crust.
2| Make it a Sheet Pan Meal: Sear the chicken in your oven-safe pan, then transfer everything to a sheet pan. Add halved baby potatoes and thick carrot chunks around the chicken before it goes into the oven to roast together.
3| Bright & Herbaceous: Skip the butter finish. After removing the chicken, stir ½ cup of a fresh herb pesto (like basil or parsley) directly into the pan juices for a vibrant green sauce.
4| Sweet & Spicy Glaze: For the last 5 minutes of baking, uncover the chicken and brush with a mix of 2 tbsp honey and 1 tbsp hot sauce. Finish under the broiler for 2-3 minutes for a sticky, glossy finish.
5| Breadcrumb Topping: Mix ½ cup panko breadcrumbs with 1 tbsp melted butter, zest of the lemon, and 2 tbsp grated Parmesan. Sprinkle over the chicken after you return it to the pan and before it goes in the oven for a crispy, cheesy crust.
A few simple tricks make the difference between "good" and "OMG, what's your secret?" Here's what I've learned:
1| Dry Skin = Crispy Skin. This is the #1 rule! Patting the marinated chicken bone-dry with paper towels before searing is non-negotiable. Any moisture will steam the skin instead of browning it.
2| Don't Crowd the Pan. Sear the drumsticks in batches if your pan isn't large enough. If they're touching, they'll steam and won't get that beautiful, crispy golden sear we're after.
3| Embrace the Brown Bits. Those dark, sticky bits left in the pan after searing? That's fond, and it's pure flavor gold. Deglazing thoroughly with the stock is what builds a deeply tasty sauce foundation.
4| Butter Must Be COLD. For the silky, emulsified pan sauce, your butter cubes need to be fridge-cold. Whisking them in slowly over low heat allows them to melt and thicken the sauce into a velvety glaze, rather than just melting into oily pools.
5| Check Temp, Not Just Time. Ovens vary. The only sure way to know your chicken is done is to use an instant-read thermometer. Insert it into the thickest part of a drumstick, avoiding the bone. 165°F is your target.
6| Resting is Part of Cooking. Let the chicken rest for 5 minutes after saucing. This allows the juices to redistribute throughout the meat, so they stay in the chicken when you cut into it, not on your plate.
7| Sauce Too Thin? If your sauce seems a bit loose, let it simmer on the stove for an extra minute or two after adding the butter to reduce and thicken slightly.
8| Fresh vs. Dried Herbs: If using fresh herbs (like thyme or oregano), triple the amount (so use about ¾ tsp of each fresh) and add them in the last 2 minutes of making the sauce so their flavor stays bright.
You've got this! Now go make some magic (and a very easy cleanup with just one pan).
Here’s how to make this already-affordable dish even kinder to your wallet, without sacrificing flavor.
Shop Smart for the Chicken:
Buy in Bulk & Freeze: Drumsticks are often cheapest in large family packs. Portion them into recipe-sized amounts (about 8-9 drumsticks) in freezer bags. Thaw in the fridge overnight when ready to use.
Watch for Sales: Drumsticks and thighs go on sale frequently. Stock up during these promotions.
Use What You Have: This method works great with any bone-in, skin-on chicken pieces (thighs, leg quarters). Buy whatever is cheapest per pound that week.
Be a Pantry Wizard:
Stock Swap: No chicken stock? Use water + 1 teaspoon of bouillon paste or powder. It works perfectly here and most of us have it in the pantry.
Caper Substitute: In a pinch, a tablespoon of chopped green olives or a squeeze of extra lemon can provide a similar briny, acidic kick.
Herb Flexibility: Don’t buy a whole jar of dried thyme or oregano just for this. Use 1 teaspoon of Italian seasoning instead, or simply omit one if you don’t have it. The garlic, lemon, and pepper flakes carry plenty of flavor.
Butter Stretch: You can reduce the butter to 1 oz (2 tbsp) and it will still make a lovely, emulsified sauce. Or, use the butter you have salted or unsalted both work (just taste before adding extra salt).
Maximize Your Meal:
Stretch with Sides: Serve with inexpensive, filling sides that soak up the delicious sauce. Mashed potatoes, polenta, rice, or a simple loaf of crusty bread turn this into a heartier meal that fills everyone up.
Repurpose Leftovers: Shred any leftover chicken off the bone and mix it back into the remaining sauce. It makes an incredible filling for sandwiches, wraps, or tossed with pasta the next day.
Make Your Own: If you cook chicken often, homemade chicken stock from saved bones and veggie scraps is essentially free flavor gold for recipes like this.
The Golden Rule: This recipe is very forgiving. Use what you have on hand the goal is a delicious, one-pan dinner, not a stressful or expensive grocery run.
Keep your chicken delicious and safe with these simple, fuss-free guidelines.
Proper Storage (The Key to Great Leftovers):
Let It Cool: Allow the chicken and sauce to cool to room temperature for no more than 2 hours before storing.
Store Together: Place the chicken and all the sauce in an airtight container.
Fridge Life: It will keep in the refrigerator for 3 to 4 days.
Freezing: You can freeze it for up to 3 months. Store in a freezer-safe container or heavy-duty bag. Thaw overnight in the fridge before reheating. Note: The texture of the sauce may separate slightly when thawed, but a good whisk during reheating will bring it back together.
The Best Ways to Reheat:
For Best Results (Oven/Toaster Oven): Preheat to 325°F. Place chicken and sauce in a baking dish, cover tightly with foil, and heat for 15-20 minutes, or until warmed through. This keeps the skin from getting soggy.
Quick & Easy (Skillet): Place the chicken and sauce in a skillet over medium-low heat. Cover and heat gently, turning occasionally, until hot all the way through. This helps re-crisp the skin a bit.
Microwave (In a Pinch): Place a portion on a microwave-safe plate, cover loosely with a damp paper towel to keep it moist, and heat in 30-second intervals until hot. The skin will soften, but the flavor will still be great.
Quick Pro-Tips:
Sauce Too Thick? Add a splash of chicken broth or water when reheating to loosen it up.
Repurpose It! Shred the leftover meat off the bone and mix it back into the sauce for an amazing chicken pasta toss, sandwich filling, or topping for a baked potato.
And that’s it! You’ve just made a restaurant-worthy meal with minimal cleanup. I hope this recipe finds a happy home in your kitchen and becomes one of those trusty, back-pocket dinners you make again and again. If you give it a whirl, I’d love to hear how it turned out for you. Now, grab that crusty bread, swipe up every last drop of that amazing sauce, and enjoy the well-deserved compliments.
Forget boring chicken! 😴 My garlic-herb drumsticks with a crazy-good lemon caper sauce are your new weeknight hero. One pan, minimal fuss, and maximum flavor. You've gotta try this! 👩🍳
Season 3.3 lbs (1.5kg) of bone-in, skin-on chicken drumsticks evenly with 2 teaspoons of kosher salt and ½ teaspoon of freshly ground black pepper. Place the seasoned chicken on a rack set over a tray or plate and refrigerate, uncovered, for a minimum of 4 hours and up to 24 hours.
2
Prepare for Cooking.
Remove the chicken from the refrigerator and pat the skin and surfaces completely dry with paper towels. Preheat the oven to 350°F (175°C).
3
Sear the Chicken.
Heat 2 tablespoons of olive oil in a large, heavy-bottomed, oven-safe skillet or braiser over medium heat. Once the oil shimmers, carefully place the chicken drumsticks in the pan, skin-side down. Sear undisturbed for 8-10 minutes, or until the skin is deeply browned and crisp. Turn the drumsticks and sear the opposite side for 1-2 minutes. Transfer the chicken to a clean plate, skin-side up.
4
Build the Sauce Base.
Pour off all but approximately 1 tablespoon of fat from the skillet. Add 5 peeled whole garlic cloves to the residual fat and sauté for 60 seconds until fragrant.
Pour in 6 fluid ounces (180ml) of low-sodium chicken stock to deglaze the pan, using a wooden spoon to scrape any fond (browned bits) from the bottom. Stir in ¼ teaspoon each of dried oregano and dried thyme, a pinch of red pepper flakes, and 2 tablespoons of fresh lemon juice.
5
Braise in the Oven.
Pour off all but approximately 1 tablespoon of fat from the skillet. Add 5 peeled whole garlic cloves to the residual fat and sauté for 60 seconds until fragrant. Pour in 6 fluid ounces (180ml) of low-sodium chicken stock to deglaze the pan, using a wooden spoon to scrape any fond (browned bits) from the bottom. Stir in ¼ teaspoon each of dried oregano and dried thyme, a pinch of red pepper flakes, and 2 tablespoons of fresh lemon juice.
6
Prepare the Finish Sauce.
Using oven mitts, carefully remove the skillet from the oven. Transfer the cooked chicken to a serving platter, tent loosely with foil, and set aside.
Place the skillet with the remaining cooking juices back on the stovetop over low heat. Add 2 ounces (60g) of drained capers. Gradually add 1.5 ounces (42g) of cold, cubed butter, whisking constantly and allowing each addition to fully incorporate and emulsify before adding the next, until a cohesive, slightly thickened sauce forms.
7
Serve
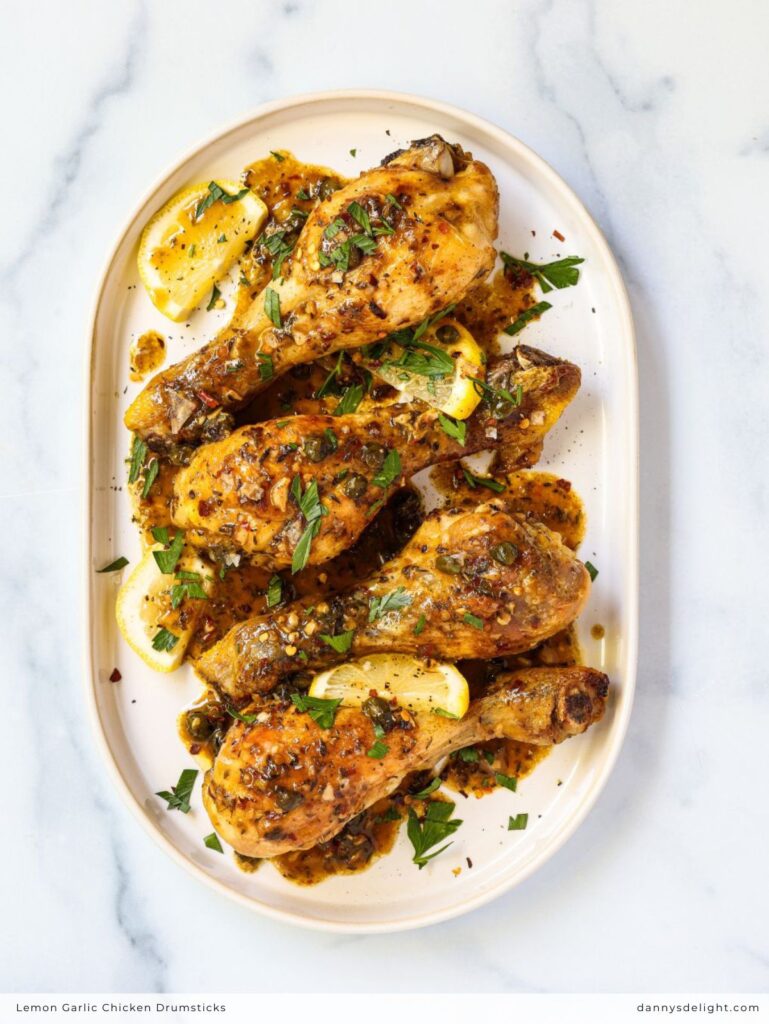
Pour the finished caper-butter sauce over the plated chicken drumsticks. Garnish with 2 tablespoons of freshly chopped parsley, if desired. Serve immediately.
8
Cook's Tips:
Those "browned bits" you scrape up when you add the stock? That's flavor central! It's the quick, easy way to build a restaurant-quality sauce right in your pan.
Nutrition Facts
Servings 6
Amount Per Serving
Calories450kcal
% Daily Value *
Total Fat30g47%
Saturated Fat11g56%
Total Carbohydrate3g1%
Dietary Fiber0.5g2%
Sugars0.5g
Protein40g80%
* Percent Daily Values are based on a 2,000 calorie diet. Your daily value may be higher or lower depending on your calorie needs.
Keywords:
garlic herb chicken drumsticks, one pan chicken dinner, easy baked chicken drumsticks, lemon caper chicken recipe, crispy skin chicken drumsticks, weeknight chicken recipes, family dinner ideas, affordable chicken recipes, braised chicken drumsticks, pan sauce chicken recipe, restaurant style chicken at home, juicy baked chicken legs, simple chicken recipes, best chicken drumstick recipe, comfort food chicken dinners, Italian inspired chicken, gluten free chicken dinner, keto friendly chicken recipes, dinner for four, meal prep chicken
Did you like this recipe?
Pin this recipe and share it with your followers.
Danny Davis
A Food Blogger
Hi, I'm Danny, the food lover and creator of this recipe blog. I aim to spark your culinary creativity with approachable recipes for all skill levels. Come join me in exploring delicious flavors and making memorable dishes together in my kitchen!