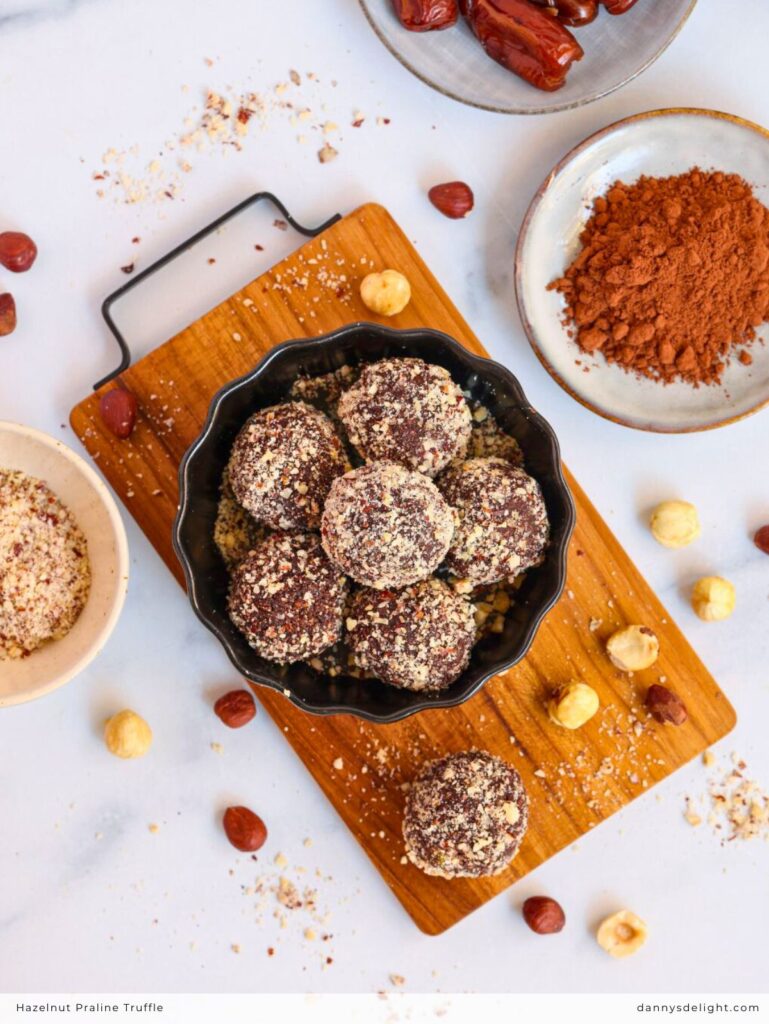
Is it just me, or does the holiday season suddenly flip a switch in your brain that just screams, "CHOCOLATE!"? I'm right there with you. This year, I was determined to create a festive treat that felt totally luxurious but wouldn't keep me chained to the kitchen all afternoon. Enter my secret weapon: these no-bake Hazelnut Praline Truffles. We're talking rich, fudgy, and ready to devour in about 20 minutes flat. They’re my new favorite way to make the house smell like a chocolate shop without any of the fuss.
Let’s keep it real if you’re looking for a treat that’s as fun to make as it is to eat, you’ve come to the right place. Here’s why you’ll be obsessed:
→ ✨ No baking required! Seriously, if you can use a blender and a spoon, you’ve got this. Perfect for busy weeks or last-minute holiday magic.
→ 🌱 Plant-based goodness. All-natural, whole-food ingredients you can feel good about. No mystery additives, no refined sugar just pure, wholesome indulgence.
→ ⏳ Ready in under 30 minutes. That’s less than an episode of your favorite show. Prep, roll, chill, enjoy. It doesn’t get easier than this.
→ 💸 Easy on your wallet. Skip the fancy chocolatier price tag. With just a few simple ingredients, these truffles taste luxe without the splurge.
→ 🎁 Perfect for gifting (or not sharing). Wrap a few in cute little bags for friends and neighbors or quietly hide them in the back of your fridge for a personal sweet escape.
🍫 Deep, rich flavor that feels fancy. The combination of nutty hazelnut, rich cacao, and caramel-like dates feels decadent and sophisticated like a treat from a boutique chocolatier.
Let’s chat about the all-star team that makes these truffles so darn good. Each one brings something special to the party:
→ Hazelnut Butter: This is the rich, nutty heart of the recipe. It gives that classic praline flavor and a creamy texture that feels totally indulgent. Using a good-quality jar is the ultimate shortcut to deliciousness.
→ Dates: Nature’s perfect sweetener! Medjool dates are my go-to they’re super soft and sticky, blending into a sweet "paste" that holds everything together and adds caramel-like notes without any refined sugar.
→ Cacao Powder: This is our chocolatey, grown-up flavor boost. It’s less processed than cocoa powder, packing a deeper, slightly bitter chocolate punch that balances the sweetness of the dates perfectly.
→ Vanilla Extract: The secret whisper of warmth. Just a teaspoon rounds out all the other flavors and makes the whole thing smell like a professional bakery. Trust me, don’t skip it!
Together, they create something that feels fancy but is honestly so simple. It’s magic made from your pantry!
NOTE: For measurements and rest of the ingredients check the recipe card below.
What You'll Need To Do
Time required: 20 mins Makes: 12 truffles
Alright, let’s make some magic happen! This is the easy, no-bake, just-blend-and-roll part. Get ready for your kitchen to smell like holiday joy.
1| First, make your date "glue." Toss those soft, pitted dates into your blender or food processor. Add a tablespoon or two of warm water to get things moving, then blitz away until you’ve got a sweet, sticky paste. If it’s being stubborn, add another tiny splash of water.
2| Time for the chocolatey mix! In a mixing bowl, plop in your hazelnut butter (or your freshly blended roasted hazelnuts you powerhouse, you!). Add the cacao powder and that gorgeous date paste you just made.
3|Bring in the flavor party. Drizzle in the vanilla extract. Now, grab a spoon and stir everything together with some enthusiasm. You’re going for a smooth, thick, and utterly delicious dough that holds together when you pinch it. If it seems too dry, you can add a teensy bit more water. Too wet? A pinch more cacao powder.
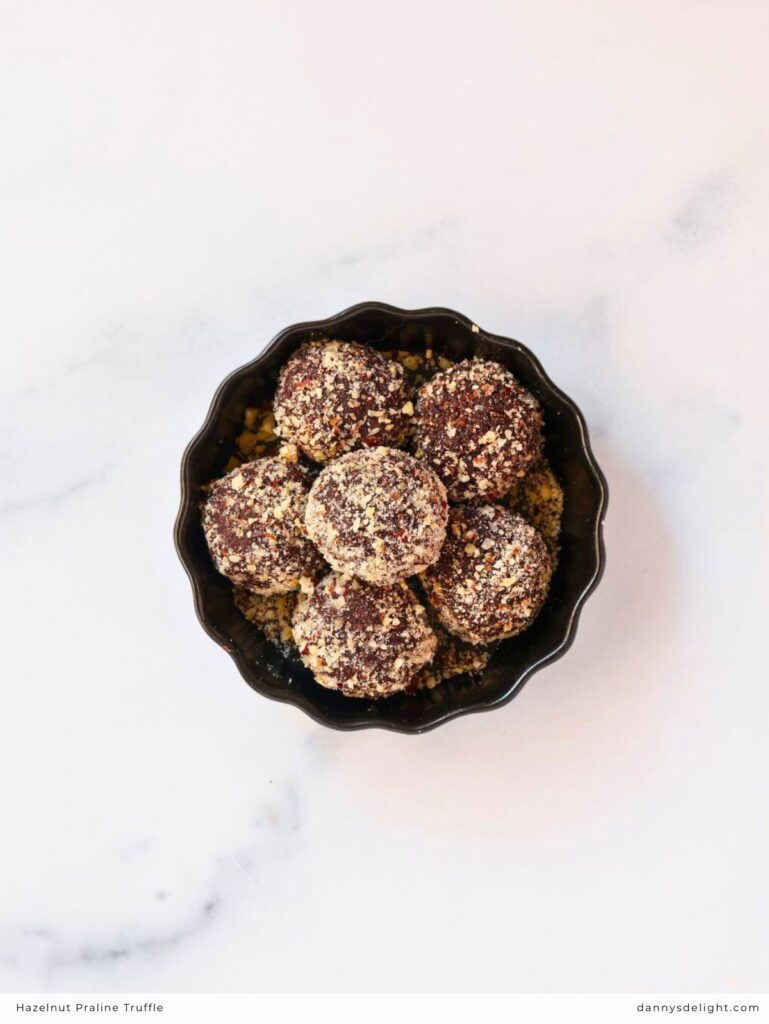
4| The fun part truffle time! Pinch off little portions and roll them between your palms into bite-sized balls. No need to be perfect; rustic is charming! Place them on a plate or baking sheet lined with parchment paper.
5| The (brief) patience test. Pop those beauties into the fridge for about 20 minutes to let them firm up. This just makes them easier to handle and even more satisfying to bite into.
And that’s it! You’ve just made incredible, festive truffles. Now, try not to eat them all before sharing… no promises, though! Enjoy!
Glycemic Index: Low (35) Glycemic Load: Low (3)
Easy Ingredient Swaps
Nut & Seed Butter Swaps
The hazelnut butter is for that classic praline flavor, but other nut or seed butters work wonderfully.
Almond Butter: A fantastic, slightly milder substitute that pairs beautifully with chocolate.
Cashew Butter: Will give you an incredibly creamy, neutral, and sweet base.
Sunflower Seed Butter: A perfect nut-free option! Just note it may give the truffles a slight greenish tint over time (a harmless reaction with the cacao) they’ll still taste amazing.
Tahini (sesame seed paste): For a more grown-up, sophisticated twist with a subtle bitterness.
Date Alternatives
If you're out of dates or prefer a different texture, try these:
Soft Medjool Dates: If your dates are a bit dry, soak them in hot water for 10 minutes before blending to make them super soft and sticky.
Maple Syrup or Agave: Use about 3-4 tablespoons of liquid sweetener instead of the date paste. You’ll likely need to add a bit more cacao powder or a tablespoon of almond flour to help the mixture firm up.
Prunes or Figs: These dried fruits blend into a similar sticky paste and offer a slightly different fruity depth.
Flavor Boosters & Mix-Ins
Take your truffles to the next level with these simple additions!
Spice it Up: Add a pinch of cinnamon, espresso powder, or even a tiny dash of cayenne pepper for a "Mexican chocolate" kick.
Citrus Zest: A little orange or lemon zest brightens up the rich flavors beautifully.
Crunch Factor: Roll the chilled balls in crushed roasted hazelnuts, desiccated coconut, extra cacao powder, or even a light sprinkle of flaky sea salt.
Dipped & Dressed: For a truly decadent treat, dip the set truffles in melted dark chocolate and let them harden on parchment paper.
Pro-Tip: The key is to get your mixture to a "dough" consistency that you can roll. If it's too wet after a swap, add a bit more cacao powder. If it's too dry, a tiny splash of water or plant-based milk will help it come together.
Have fun experimenting and making this recipe your own
Give your truffles a whole new personality with just an extra ingredient or two.
→ Salted Caramel Vibes: Add a generous pinch of flaky sea salt to the mix. Roll the finished balls in a mix of cacao powder and a little more salt.
→ Orange Chocolate Dream: Add 1-2 teaspoons of fresh orange zest to the dough. A tiny drop of orange extract can amplify it if you're a big fan.
→ Mocha Moment: Blend in ½ - 1 teaspoon of instant espresso powder or fine ground coffee with the dry ingredients for a rich coffee-chocolate flavor.
→ "Cookie Dough" Style: Add a handful of mini dairy-free chocolate chips after mixing the dough for little melty pockets of chocolate.
→ Minty Fresh: Substitute the vanilla extract for peppermint extract (start with ¼ tsp, it's strong!). Roll in crushed candy canes for a festive look.
Coating & Crunch Twicks
The outside is your canvas for extra texture and visual pop.
Classic Roll: Roll the set balls in cacao powder, crushed nuts (hazelnuts, pistachios), desiccated coconut, or matcha powder.
Chocolate Shell: For a pro finish, dip the chilled truffles in melted dark chocolate and let them set on parchment paper.
Sandy Sugar: For a sparkly look, roll them in cacao powder or a light coating of coconut sugar.
Shape & Serving Hacks
Play with the form for a different experience.
Truffle Bark: Press the mixture into a small parchment-lined dish instead of rolling balls. Chill, then break into rustic shards.
Stuffed Surprise: Press the mixture around a single roasted coffee bean, a whole hazelnut, or a dried cherry before rolling.
Truffle "Tartlets": Press a small amount of the mixture into a mini muffin tin to form little cups. Fill with a dollop of coconut yogurt or a berry after chilling.
Dietary & Texture Tweaks
Adjust for preferences or what's in your pantry.
Extra Protein: Add a scoop of your favorite plain or vanilla plant-based protein powder. You may need an extra teaspoon or two of water to combine.
Superfood Boost: Stir in a tablespoon of chia seeds or hemp hearts for added nutrients and a slight texture.
Oil-Free Option: If your nut butter is very dry, use a splash of water or plant-based milk to bring the dough together instead of oil.
Lower Sugar: Use half dates and half unsweetened, dried apricots for a tangier, less sweet result.
My best tip? Make a single batch of the base dough, then separate it into small bowls to try 2-3 different mix-ins or coatings at once. It’s like your own personal truffle tasting party
Warm Your Dates: If your dates aren’t super soft and sticky, soak them in hot water for 5-10 minutes before blending. Drain them well first this makes them blend into a smooth paste like a dream.
Blender Buddy: When blending just the dates, a mini food processor or a high-speed blender works best. If you’re making nut butter from scratch, a full-size food processor is your best friend for getting that creamy texture.
Scrape & Stir: Stop and scrape down the sides of your bowl or blender a few times while mixing. This ensures everything gets evenly incorporated and you don’t miss any hidden pockets of dry cacao powder.
Texture & Consistency is Key
The "Pinch Test": Before you start rolling, pinch a bit of the mixture. It should hold together firmly without being overly sticky. If it crumbles, it’s too dry add water, ½ teaspoon at a time. If it’s greasy or super sticky, it’s too wet add a bit more cacao powder.
Chill for Easier Rolling: If the dough feels too soft or sticky to handle after mixing, pop it in the fridge for 15 minutes. This firms up the fats a bit and makes rolling much cleaner.
Wet Hands Trick: For perfectly smooth, crack-free truffles, dampen your palms slightly with water before rolling each ball. This prevents the dough from sticking to your hands.
Storage & Gifting Hacks
Store Smart: Keep truffles in an airtight container in the fridge for up to 2 weeks. They also freeze beautifully for up to 3 months just thaw in the fridge before enjoying.
Layer for Freshness: If stacking truffles in a container, place parchment paper between layers to prevent them from sticking together or getting squished.
Gift Them Pretty: For gifting, place truffles in mini paper cupcake liners before boxing them up. It looks professional and keeps them from rolling around.
Flavor & Fun
Taste as You Go! Before rolling, taste a tiny bit of the mixture. Want more salt? More vanilla? More cacao? Now’s the time to adjust.
Double for a Crowd: This recipe doubles (or triples!) perfectly for holiday parties or making big batches for gifts.
Get Kids Involved: The rolling stage is a fantastic, no-bake activity for little helpers. Let them have fun with the shaping and rolling in toppings.
Remember: No two batches are exactly alike, and that’s part of the charm. Have fun with the process it’s supposed to be delicious, not stressful
Making fancy treats at home is already a win for your wallet, but here’s how to make these truffles even more budget-savvy without sacrificing flavor.
🥜 Be Your Own Nut Butter Boss - Instead of buying pricier pre-made hazelnut butter, grab a bag of raw or roasted hazelnuts (or even almonds or peanuts) from the bulk bin. Toast them lightly if raw, then blend in your food processor until creamy. It takes a few minutes, but the savings are real and you control the freshness and texture.
📦 Shop Smart for Staples
Dates: Look for bulk-bin pitted dates or larger bags of Deglet Noor dates (they’re often cheaper than Medjool and work perfectly once soaked).
Cacao: A big container of natural cocoa powder is more affordable than cacao powder and tastes great here. You likely have it in your pantry already!
Vanilla: If you’re out of extract, a tiny pinch of vanilla bean powder (if you have it) or even skipping it in a pinch is okay the dates and chocolate will still shine.
🔄 Stretch & Save with Swaps
Nut Butter Swap: Use peanut butter it’s almost always the most affordable nut butter and gives a delicious, familiar flavor.
Sweetener Swap: If you’re low on dates, you can replace half with raisins or prunes, which are often less expensive. Soak them first to soften.
🎁 Batch & Store for Value
Double the Batch: The recipe scales up easily. Making a bigger batch costs only pennies more per truffle and means you always have a homemade treat on hand, saving you from expensive store-bought impulse buys.
Freeze for Later: These freeze perfectly. Make a big batch, freeze truffles in a single layer, then store in a bag. Grab one whenever a sweet craving hits it’s your own frugal dessert insurance!
🧁 Topping Tricks on a Dime - Skip expensive coatings. A light roll in extra cocoa powder or a dusting of powdered sugar looks elegant and uses what you already have. Crushed cereal or graham crackers also make a fun, crunchy, low-cost roll.
💡 The Best Tip: Prevent Waste - Make sure your dates and nut butters are stored well (dates in the fridge, nut butter upside down in the pantry) so they last. Using every bit of what you buy is the ultimate money-saver.
Bottom line: Homemade is already the budget-friendly choice. With these tweaks, you’re not just making truffles you’re making smart truffles. Happy saving (and snacking)!
Serving Ideas
Taking these truffles from "simple snack" to "special occasion" is easy with a few creative serving ideas. Here are some laid-back and festive ways to share (or savor) them.
For Everyday Enjoyment
The Coffee/Tea Companion: Serve 2-3 truffles on a small plate alongside your afternoon coffee or evening tea. They’re the perfect rich, bite-sized pairing.
Lunchbox Surprise: Tuck one or two in a sealed container in your (or your kid’s) lunchbox for a wholesome, energizing sweet treat.
The After-Dinner Mint, But Better: Place a few on a shared plate after a meal for a casual, guilt-free dessert that feels intentional.
For Holiday & Special Occasions
The Festive Dessert Platter: Arrange truffles on a board or platter with other easy treats like dried fruit, toasted nuts, and store-bought cookies for a stunning, no-fuss dessert spread at parties.
Gift Them in Style: Package 3-4 truffles in small cellophane bags tied with ribbon, or in a decorative mini box or mason jar. Add a handwritten tag for a personal touch everyone will love.
"Deconstructed" Dessert Bowl: Crumble a truffle over a bowl of vanilla ice cream, coconut yogurt, or chia pudding. It adds incredible flavor and a bit of crunch.
Fun & Interactive Ideas
DIY Truffle Bar: Set out a bowl of the chilled, plain truffle balls with small dishes of different coatings (like crushed nuts, coconut, cacao powder, matcha) and let guests roll their own. It’s a great activity!
Fancy Affogato: Place a truffle in the bottom of a cup and pour a shot of hot espresso over it. Let it melt a little, then enjoy with a spoon. Decadent.
Sweet Charcuterie: Add truffles to a cheese or charcuterie board. Their sweet, rich flavor pairs surprisingly well with sharp cheeses, salty crackers, and fresh fruit like pears or grapes.
Pro-Styling Tips
Use What You Have: A simple white plate makes them pop. A vintage saucer or a piece of parchment paper on a wooden board also looks effortlessly chic.
Sprinkle for Effect: A very light dusting of powdered sugar or cocoa powder on the plate under the truffles makes them look straight from a bakery.
Keep Them Cool: If serving at a party, place the platter out just before guests arrive, or keep it on a cooler part of the table so they stay firm.
Short-Term (Up to 2 Weeks): Store in an airtight container in the fridge. This is the best spot for keeping their shape and texture perfect.
Long-Term (Up to 3 Months): Freeze them! Arrange truffles in a single layer on a parchment-lined baking sheet until solid. Then, transfer to a freezer bag or airtight container. Thaw in the fridge for an hour before eating. They taste just-made!
Smart Layering
Prevent Stickiness: If stacking truffles, place a sheet of parchment or wax paper between layers. This keeps them from sticking together and protects any delicate coatings (like crushed nuts).
Keep 'Em Fresh
Avoid the Odor Fridge: Truffles can absorb strong fridge smells. Make sure your container seals very tightly. A glass container with a clamp lid is perfect for this.
Crisper Drawer Trick: For the absolute best freshness in the fridge, store your airtight container in the crisper drawer. It has more consistent humidity.
On-the-Go & Gifting
Portable Snacks: Use a small, hard-sided container (like a mini Tupperware or an empty tea tin) to pack a few truffles in a lunchbox or purse without crushing them.
Gift Storage Note: If gifting, remind your friends to store them in the fridge or a cool place. A little note like "Keep me cool!" on the tag is a cute and helpful touch.
A Quick "Don't"
Avoid Room Temp: Don't leave them out on the counter for more than a few hours, especially if your kitchen is warm. The nut butter base will soften, and they can lose their shape.
Bottom Line: Your fridge is your truffle's best friend. A sealed container is key. And the freezer is your secret weapon for always having a ready-to-eat treat!
And that’s all there is to it, friends. I hope you get a chance to whip up a batch of these little guys. Whether you’re leaving them out for Santa, packing them up for gifting, or let’s be honest hiding them in the back of the fridge for a midnight snack, they’re a guaranteed win. From my kitchen to yours, happy rolling, and have the sweetest, most delicious holiday season. Now go enjoy your well-earned truffles!
You have to try these no-bake hazelnut date truffles! 🎄 Made with just five simple ingredients like hazelnut butter and cacao, they're a rich, healthy dessert that's ready for the holidays in under 30 minutes.
Ingredients
5oz hazelnut butter or blended roasted hazelnuts (140g)
5oz pitted dates (140g)
2tbsp cacao powder
1tsp vanilla extract
Instructions
1
Process the Dates:
Using a food processor or high-speed blender, combine the pitted dates with 1-2 tablespoons of warm water. Process until a cohesive, smooth paste forms. If necessary, pause to scrape down the sides of the bowl to ensure uniform consistency.
2
Combine Primary Ingredients:
In a separate mixing bowl, add the hazelnut butter (or blended roasted hazelnuts), cacao powder, and the prepared date paste.
3
Incorporate Flavors and Mix:
Introduce the vanilla extract to the mixture. Using a spatula or wooden spoon, stir firmly and consistently until all ingredients are fully integrated and a uniform, smooth dough is achieved.
4
Form the Truffles:
Portion the mixture, then roll each portion between clean palms to form evenly sized, spherical truffles approximately 1 inch (2.5 cm) in diameter.
5
Set and Firm:
Transfer the formed truffles to a parchment-lined tray or plate. Refrigerate for a minimum of 20 minutes, or until the exterior is firm to the touch.
Nutrition Facts
Servings 12
Amount Per Serving
Calories115kcal
% Daily Value *
Total Fat8g13%
Total Carbohydrate10g4%
Protein2g4%
* Percent Daily Values are based on a 2,000 calorie diet. Your daily value may be higher or lower depending on your calorie needs.
Hi, I'm Danny, the food lover and creator of this recipe blog. I aim to spark your culinary creativity with approachable recipes for all skill levels. Come join me in exploring delicious flavors and making memorable dishes together in my kitchen!