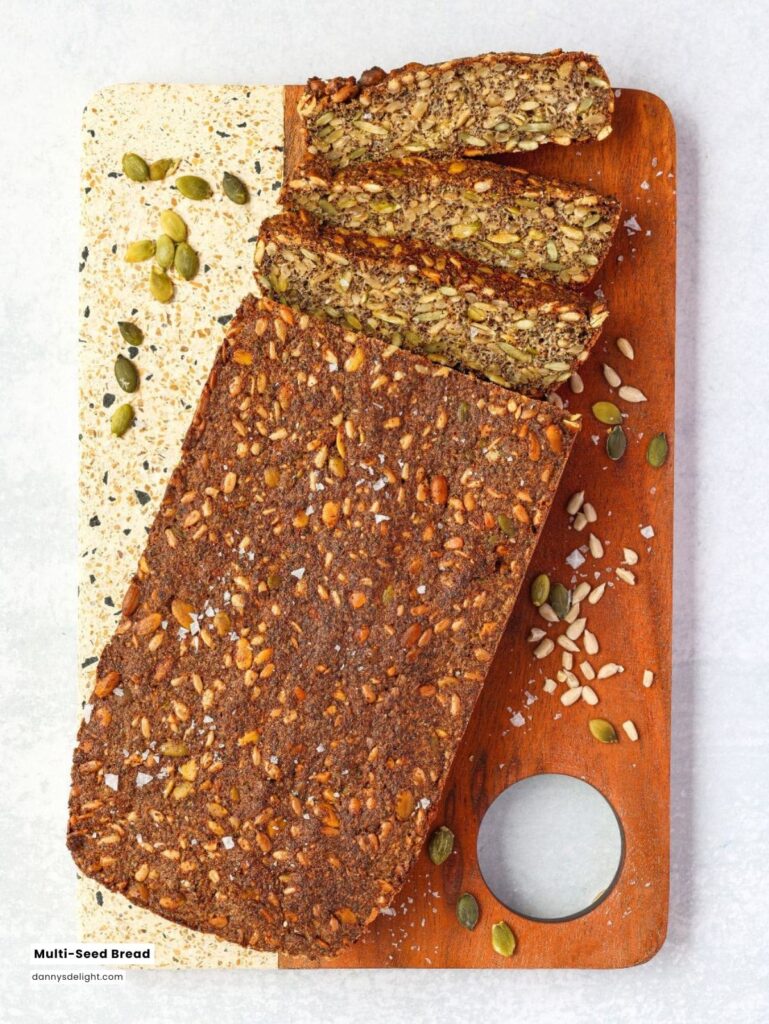
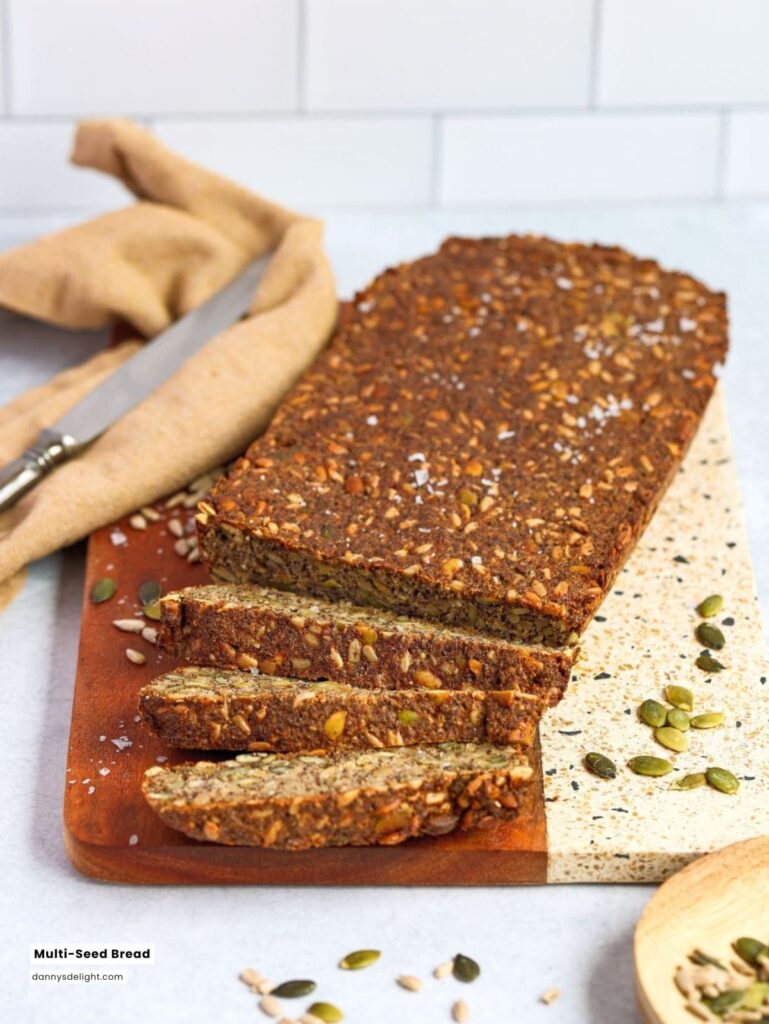
I’ve always been a sucker for a good, hearty slice of breadespecially the kind that’s loaded with seeds, crunchy edges, and just the right amount of chew.
This Multi Seed Bread hits all the right notes.
It’s gluten-free, dairy-free, low-carb, packed with healthy fats, and honestly... it just makes me feel like I’ve got my life together when I eat it.
Whether you’re topping it with avocado, almond butter, or just munching it straight up, this loaf’s gonna be your new go-to.
→ Psyllium Husk Powder – This one’s a secret weapon for gluten-free baking. It soaks up water like a champ and gives the bread that soft, chewy texture (without any actual gluten in sight).
→ Chia & Flaxseeds – Tiny but mighty! These seeds are full of fiber, omega-3s, and help bind everything together naturally. Plus, they add a subtle nutty flavor and a little crunch.
→ Sunflower & Pumpkin Seeds – These bring the texture party. Toasty, crunchy, and loaded with healthy fats, they make every bite feel hearty and satisfying.
→ Hemp Seeds – A plant-based protein powerhouse. They’re soft, slightly nutty, and sneak in a ton of nutrition without overpowering the flavor.
→ Tahini – Creamy, savory, and totally underrated in bread recipes. It adds richness, helps bind everything, and gives the loaf that little something extra.
→ Maple Syrup (just a touch) – Just a splash to balance out the earthiness of all the seeds. Don’t worryit doesn’t make the bread sweet, just well-rounded.
NOTE: For measurements and rest of the ingredients check the recipe card below.
What You'll Need To Do
Time required: 60 mins
1. Preheat the oven and prepare the loaf pan Preheat the oven to 375°F (190°C). Line a standard loaf pan (8.5 x 4.5 x 2.5 inches) with parchment paper, ensuring the paper extends over the edges for easy removal.
2. Combine the dry ingredients In a large mixing bowl, combine the following:
psyllium husk powder
chia seeds
ground flaxseed
sea salt
raw sunflower seeds
raw pumpkin seeds
hemp seeds
sesame seeds
Mix thoroughly to evenly distribute the ingredients.
3. Add wet ingredients and form the dough Add 1 tablespoon maple syrup, tahini, and water to the dry mixture. Stir until a thick, uniform dough forms.
4. Transfer to the pan and level Spoon the dough into the prepared loaf pan. Using clean hands or a spatula, press and spread the dough into an even layer, ensuring it fills the corners of the pan.
5. Bake the bread Place the loaf pan in the preheated oven and bake for 50 minutes, or until the bread sounds hollow when tapped. If necessary, continue baking for an additional few minutes to ensure it is fully set.
6. Cool the bread Remove the loaf from the oven and allow it to rest for 2–3 minutes. Then, using the parchment paper, lift the bread out of the pan and place it on a wire cooling rack.
1. Use parchment paperseriously. Don’t skip this step! It makes lifting the bread out so much easier and saves you from scrubbing stuck-on bits later.
2. Let the dough sit for a minute or two. Once mixed, give the dough a few minutes to thicken before transferring it to the pan. The psyllium and chia will soak up the water and help firm things up.
3. Press the dough down evenly. Use your hands or the back of a spoon to really press it into the corners of the pan. This helps it bake evenly and gives you a nice uniform loaf.
4. Tap test = your best friend. You’ll know it’s done when the loaf sounds hollow if you tap it. If it’s still soft or squishy in the middle, give it a few extra minutes in the oven.
5. Cool before slicing. (Yes, really.) Let it cool for at least 15 minutes before cuttingthis helps it set and slice cleanly. If you cut it too early, it might crumble.
6. Store it right. Keep leftovers in an airtight container in the fridge for up to a week. It also freezes like a dreamjust slice first and pop it in a freezer bag.
7. Toast it for max flavor. This bread is next-level when toasted. It brings out the nutty flavors and gives you extra crunch. So good with avocado or a slather of nut butter!
1. Avocado toast, but upgraded Mash up some avocado, add a sprinkle of chili flakes or everything bagel seasoning, and maybe a fried egg on top if you’re feeling extra.
2. Nut butter & banana Spread on some almond or peanut butter, add banana slices, and hit it with a little cinnamon or drizzle of honey for a sweet start to your day.
3. Hummus & roasted veggies Top with hummus, leftover roasted veggies, maybe even a few olivesmakes a killer light lunch.
4. Classic sandwich vibes Use it like regular sandwich bread! Stack it with turkey, cheese (or plant-based cheese), lettuce, tomatowhatever you’ve got.
5. Toast it + butter = heaven Sometimes simple is best. Toast it and slather with a little vegan butter or ghee. Instant comfort food.
6. Sweet tooth? Try this. Top with cream cheese or Greek yogurt and a few fresh berries. Add a little maple syrup or jam if you’re feeling fancy.
7. Dip it like crackers Slice thin and toast into crispy stripsperfect for dipping into soups, stews, or your fave dips like baba ganoush or spinach artichoke.
1. Let it cool completely first Before storing, make sure the bread is totally coolthis keeps moisture from sneaking in and making it soggy.
2. Fridge it for the week Pop the slices in an airtight container or zip-top bag and store them in the fridge for up to 7 days. They’ll stay fresh and ready for grab-and-go action.
3. Freeze for later This bread freezes like a champ! Just slice it first, then layer parchment between slices or use freezer-safe bags. It'll keep for up to 3 months.
4. Toast straight from frozen No need to thawjust toss a frozen slice in the toaster or toaster oven. Comes out warm, crisp, and ready to roll.
5. Quick microwave tip In a hurry? You can microwave a slice for 10–15 seconds to warm it up. It won't be crispy like toasting, but still soft and tasty.
6. Reheat in a pan (bonus crunch!) For that golden crust, reheat slices in a dry skillet over medium heat for a couple of minutes per side. It gets nice and toasty without drying out.
This crunchy, seed-packed bread is gluten-free, dairy-free, and low-carb 🌻💪 Made with tahini, chia, and all the good stuff easy to bake, slice, and love!
Ingredients
1.6oz psyllium husk powder (45g)
1.6oz chia seeds (45g)
1.1oz ground flaxseed (30g)
5.3oz raw sunflower seeds (150g)
2.8oz raw pumpkin seeds (pepitas) (80g)
1.2oz hemp seeds (35g)
1.2oz sesame seeds (35g)
1tbsp maple syrup
2.1oz tahini (60g)
Instructions
1
1. Preheat the oven and prepare the loaf pan
Preheat the oven to 375°F (190°C). Line a standard loaf pan (8.5 x 4.5 x 2.5 inches) with parchment paper, ensuring the paper extends over the edges for easy removal.
2
2. Combine the dry ingredients
In a large mixing bowl, combine the following:
1.6 oz. (45g) psyllium husk powder
1.6 oz. (45g) chia seeds
1.1 oz. (30g) ground flaxseed
½ teaspoon sea salt
5.3 oz. (150g) raw sunflower seeds
2.8 oz. (80g) raw pumpkin seeds
1.2 oz. (35g) hemp seeds
1.2 oz. (35g) sesame seeds
Mix thoroughly to evenly distribute the ingredients.
3
3. Add wet ingredients and form the dough
Add 1 tablespoon maple syrup, 2.1 oz. (60g) tahini, and 10 fl oz. (295 ml) water to the dry mixture. Stir until a thick, uniform dough forms.
4
4. Transfer to the pan and level
Spoon the dough into the prepared loaf pan. Using clean hands or a spatula, press and spread the dough into an even layer, ensuring it fills the corners of the pan.
5
5. Bake the bread
Place the loaf pan in the preheated oven and bake for 50 minutes, or until the bread sounds hollow when tapped. If necessary, continue baking for an additional few minutes to ensure it is fully set.
6
6. Cool the bread
Remove the loaf from the oven and allow it to rest for 2–3 minutes. Then, using the parchment paper, lift the bread out of the pan and place it on a wire cooling rack.
7
7. Slice and serve
Allow the bread to cool for at least 15 minutes before slicing. Cut into 16 even slices. One slice constitutes a single serving.
Nutrition Facts
Servings 16
Amount Per Serving
Calories177kcal
% Daily Value *
Total Fat13g20%
Total Carbohydrate9g3%
Protein9g18%
* Percent Daily Values are based on a 2,000 calorie diet. Your daily value may be higher or lower depending on your calorie needs.
Hi, I'm Danny, the food lover and creator of this recipe blog. I aim to spark your culinary creativity with approachable recipes for all skill levels. Come join me in exploring delicious flavors and making memorable dishes together in my kitchen!