
You know those nights when you just want something that feels cozy, fills you up, and doesn’t turn the kitchen into a disaster zone? Me too. That’s exactly why I make these Chicken and Zucchini Fritters on repeat. They’re my no-fuss, all-flavor secret weapon. We’re talking tender patties packed with veggies, pan-fried to a perfect golden crisp, and ready before you can even decide what to watch. Let’s skip the complicated stuff and get straight to the good part.
Try my Baked Cottage Cheese Tomato Fritters recipe.
Why You’ll Love This Recipe
Let’s be real, sometimes you just need a dinner win that doesn’t take all evening. That’s where these fritters come in!
Here’s why they’re about to become a regular in your kitchen:
→ So. Darn. Easy. If you can mix stuff in a bowl and flip a patty, you’ve got this. No fancy techniques, no weird tools just straightforward, tasty cooking.
→ Sneak Veggies In (Shhh…) Packed with zucchini and green onions, these fritters are a delicious way to get more veggies on the table especially for picky eaters. They’ll never know!
→ Unbelievably Moist & Tender: Thanks to the ricotta cheese, every bite is juicy and tender on the inside while staying perfectly crispy on the outside. No dry patties here!
→ Ready in Under 40 Minutes: From fridge to plate in less time than it takes to watch an episode of your favorite show. Perfect for busy weeknights.
→ Endlessly Adaptable: Eat them on their own, tucked into a bun like a burger, on top of a salad, or with a dollop of yogurt or ranch on the side. They’re happy anywhere.
→ Family & Kid-Approved: These are a guaranteed crowd-pleaser great for adults who want something satisfying, and just plain fun for kids to eat.
→ Budget-Friendly: Made with simple, easy-to-find ingredients, this meal is light on your wallet but feels totally special.
Basically, if you love flavor, ease, and a recipe that actually works the first time you’re in the right place. Let’s cook!
Try my Harissa Sweet Potato Fritters recipe.
What You’ll Need To Make
Let’s chat about the ingredients that make these fritters so good. It’s not a long grocery list, and each one has a very important job!
→ The Zucchini: This is our veggie star! Grating it and giving it a good squeeze is the secret step to avoid soggy fritters. It adds moisture, a hint of sweetness, and a great texture without overpowering everything else.
→ The Ground Chicken (or Turkey!): This is our protein-packed base that makes these fritters hearty enough for a main dish. Using ground poultry keeps things light, and it soaks up all the other flavors beautifully. Turkey works just as well if that’s what you have!
→ The Ricotta Cheese: Here’s the magic ingredient for insanely tender fritters. Ricotta adds a subtle creaminess and keeps the patties incredibly moist and fluffy on the inside no dry, dense hockey pucks here! It’s a game-changer.
→ The Green Onions & Garlic: This is our flavor boost! The green onions give a fresh, mild bite, while the garlic brings that essential savory, cozy depth. Together, they make the kitchen smell amazing and add layers of flavor without any fuss.
So there you have it! Simple ingredients, each playing their part to create something seriously delicious. Now, let’s get cooking!
NOTE: For measurements and rest of the ingredients check the recipe card below.
What You’ll Need To Do
Serves: 4 Time: 40 mins
Alright, friends! It’s time to turn that bowl of ingredients into crispy, golden, delicious fritters. Here’s the fun, simple, and slightly messy part.
1. Say Bye-Bye to Zucchini Water! First up, grab your grated zucchini and put it in a colander (or a bowl). Give it a good sprinkle with about a teaspoon of salt, toss it around, and let it hang out for 10 minutes. This pulls out the extra water so your fritters aren’t soggy. After its little salt spa, grab handfuls and squeeze, squeeze, squeeze until no more liquid comes out. Toss that liquid and keep the dry, happy zucchini.
2. The Big Mix-Up! In a large bowl, bring the whole crew together: your squeezed-dry zucchini, the ground meat, another teaspoon of salt, a good crack of black pepper, the sliced green onions, the egg, minced garlic, and that lovely ricotta. Now, roll up your sleeves and use your hands to mix it all up until everything is just combined. Don’t over-mix, just make sure it’s one happy, cohesive mixture.
3. Patty Time & Pan Sizzle. Heat a large non-stick skillet over medium heat and add your first tablespoon of olive oil. While that’s getting warm, scoop up a heaping tablespoon of the mixture and gently form it into a patty, about ⅓-inch thick. It doesn’t have to be perfect! Place it gently in the pan. You can probably fit 3-4 at a time, depending on your pan size.
4. Cook to Golden Perfection. Let them cook, uncovered, for about 3 minutes, until you see a gorgeous golden-brown crust forming on the bottom. Carefully flip them! Once flipped, cover the skillet with a lid and let them cook for another 3-4 minutes. This keeps them juicy inside while making sure the meat is cooked through.
5. Repeat & Enjoy! Transfer your beautiful fritters to a plate and repeat with the remaining mixture, adding another tablespoon of oil to the pan for each new batch.
And that’s it! Serve them up warm and get ready for the compliments. Enjoy your homemade, cozy, and utterly tasty fritters

Glycemic Index: Low (~15-25) Glycemic Load: Very Low (~2-4)
Get Free Cookbooks

Kickstart your keto journey with our FREE Keto Cookbooks! 🎉 Packed with delicious recipes, these print copies are yours for the taking. Don’t wait – order now and start cooking your way to a healthier you! 🚀📚
*Hurry! offer valid till stock lasts.
Mix It Up! Easy Ingredient Swaps
No ricotta? No green onions? No problem! This recipe is super flexible. Here are some easy swaps to make it work with what you’ve got.
1| Instead of Ricotta: Try cottage cheese (small curd, blended smooth if you prefer), feta cheese (crumbled, for a tangy kick!), or even plain Greek yogurt. If you want to keep it dairy-free, unsweetened applesauce (in a smaller amount, about 1/4 cup) can help with moisture.
2| Instead of Ground Chicken/Turkey: Ground pork or even lean ground beef would be delicious. For a plant-based twist, try a 12-oz package of thawed and well-squeezed plant-based ground “meat” or lentils.
3| Instead of Zucchini: Grated carrots, sweet potato, or even yellow squash would work wonderfully here. Just remember the golden rule: grate, salt, and squeeze to remove excess water!
4| Instead of Green Onion: Use 2-3 tablespoons of finely chopped red or yellow onion, or a teaspoon of onion powder. Fresh chives or dill would also be a lovely fresh herb substitute.
5| Flavor Boosters (Add-Ins): Feel free to stir in a handful of shredded cheddar or parmesan, a dash of smoked paprika, some chopped fresh herbs (like parsley or basil), or a little lemon zest for brightness.
Pro-Tip: The binding agents (egg, cheese/yogurt) and the moisture control (squeezing the veg) are the key steps. As long as you keep those in mind, you can get creative with the rest!
Try my Carrot and Corn Fritters with Mint Yogurt Dip recipe.
Get Creative! Fun Twists & Tweaks
Ready to make this recipe your own? Here are some delicious twists to change up the flavor profile and keep things exciting!
1| Mediterranean Twist: Swap the ricotta for crumbled feta cheese and add a handful of chopped sun-dried tomatoes and kalamata olives. Finish with a sprinkle of dried oregano.
2| Spicy Southwest Style: Add 1/4 cup of canned corn (drained), a minced jalapeño, and 1/2 teaspoon of cumin to the mix. Serve with a creamy cilantro-lime sauce or avocado.
3| Italian Herb Version: Mix in 2 tablespoons of grated parmesan, 1 teaspoon of Italian seasoning, and substitute the green onions for 2 tablespoons of freshly chopped basil.
4| “Everything Bagel” Fritters: After cooking, while the fritters are still hot, press the tops gently into a plate of everything bagel seasoning for that iconic, savory crunch.
5| Baked, Not Fried (For Hands-Off Ease): Place formed patties on a parchment-lined baking sheet, brush lightly with oil, and bake at 400°F (200°C) for about 20-25 minutes, flipping halfway through.
6| Make Them Mini (Perfect for Apps!): Use a teaspoon to scoop the mixture and form small, bite-sized patties. Reduce cooking time to about 2 minutes per side. Perfect for parties or dipping!
7| Turn Them into Burgers: Form the mixture into 4 larger, thicker patties. Cook as directed, then serve on toasted buns with lettuce, tomato, and a garlic aioli.
8| Add a Crunchy Coating: Before cooking, gently press each patty into panko breadcrumbs for an extra crispy, golden exterior.
Cheesy Pull-Apart: Press a small cube of mozzarella cheese into the center of each patty as you form them, ensuring the meat mixture fully encloses it. Enjoy the melty surprise inside!
The best part? You can mix and match these ideas! Try a spicy Italian version or mini baked “everything bagel” bites. Have fun with it.
Try my Sweet Potato and Peanut Stew recipe.
Chef’s Tips for Fritter Success!
Want to nail these fritters on the first try? Here are my tried-and-true tips to make sure they’re perfectly crispy, flavorful, and easy every single time.
1| Squeeze Your Zucchini Like It Owes You Money! Seriously, this is the #1 most important step. Get out as much liquid as possible. I like to use a clean kitchen towel or cheesecloth and really wring it out. Dry zucchini = crispy, not soggy, fritters.
2| Don’t Over-Mix! Once you combine all the ingredients, stop mixing! Overworking the meat and ricotta can make the fritters a bit tough. Just mix until you don’t see any big streaks of ricotta left.
3| Test Your Seasoning. Before you cook the whole batch, make a tiny mini-patty and cook it in the skillet for a minute on each side. Taste it! This lets you adjust the salt or pepper in the rest of the mix before it’s too late.
4| The Pan Needs to Be Properly Hot. Let your oil get nice and shimmering over medium heat before adding the patties. If the pan isn’t hot enough, they’ll steam and stick instead of getting that golden-brown sear we love.
5| Don’t Crowd the Pan. Give each fritter some personal space! Crowding will lower the pan’s temperature and make them steam. Cook in batches for the best crust.
6| The “Flip & Lid” Method is Key. The initial uncovered fry gives us color and crust. Flipping and then covering with a lid traps steam to gently finish cooking the inside without burning the outside. Don’t skip the lid!
7| Let Them Rest. It’s tempting to dig right in, but let the fritters rest on a wire rack or paper towel for 3-4 minutes after cooking. This helps them set and ensures they stay together when you pick them up.
8| Keep Them Warm. If cooking in batches, keep finished fritters warm on a baking sheet in a 200°F (95°C) oven while you cook the rest. They’ll stay perfectly crispy and hot for serving.
Try my Cottage Cheese Protein Omelet recipe.

Budget-Friendly Tips for Delicious Fritters
Let’s be real keeping meals tasty and affordable is a win. Here’s how to make this recipe even friendlier on your wallet, without skimping on flavor.
1| Buy in Bulk When You Can. Grab a larger package of ground chicken or turkey it’s almost always cheaper per pound. You can use what you need and freeze the rest in portion-sized bags for next time.
2| Swap for Cheesy Alternatives. Ricotta can be pricey. Cottage cheese (blended until smooth) or even plain Greek yogurt works great as a creamy, moist binder for less.
3| Use Your Leftover Veggies. Got half an onion or a lonely carrot in the crisper? Finely chop or grate it and throw it in! Just remember to squeeze any extra water from watery veggies.
4| Make Your Own “Pre-Mix” Spice Blend. Instead of buying a specialty seasoning, use pantry basics: garlic powder, onion powder, salt, and pepper are all you really need. Dried Italian herbs are a cheap add if you have them.
5| Shop Seasonally & Sales. Zucchini is cheapest in the summer. If it’s pricey, check the frozen aisle for frozen grated zucchini or squash (thaw and squeeze well!). Keep an eye on weekly flyers for meat and dairy sales.
6| Don’t Waste Those Green Tops! If you buy green onions with the roots attached, save the white ends. Place them in a glass with a little water on your windowsill they’ll regrow in days for future recipes.
7| Batch Cook & Freeze. Double the recipe and freeze cooled fritters between sheets of parchment paper in a zip-top bag. Reheat in a toaster oven or air fryer for a quick, affordable future meal.
8| Serve with Simple Sides. You don’t need fancy sides! A simple green salad, steamed rice, or even just a dollop of store-brand sour cream or yogurt makes a complete, satisfying plate.
9| Use a Trusty Non-Stick Pan. A good non-stick skillet means you can use less oil for cooking, saving both oil and potential frustration from sticking patties.
Happy cooking and saving! 🥕💰
Try my Sweet Potato and Tofu Hash recipe.
Serving Ideas Make It a Meal!
These fritters are delicious on their own, but here’s how to turn them into a full, fabulous meal that everyone will love.
1| The Classic Plate: Serve 2-3 fritters with a simple side salad (mixed greens with a lemony vinaigrette) and a scoop of garlic herb mashed potatoes or buttery rice pilaf. Easy, balanced, and always satisfying.
2| Fritter Bowl: Crumble 1-2 fritters over a big bowl of quinoa or farro. Add roasted veggies (like cherry tomatoes and broccoli), a handful of greens, and drizzle with a creamy tzatziki or lemon-tahini dressing.
3| Fritter “Slider” Bar: Make mini fritters and set out small brioche or potato rolls with toppings like: sliced avocado, crispy lettuce, tomato, pickled onions, and sauces (chipotle mayo, ranch, or honey mustard). Let everyone build their own!
4| Brunch Star: Pair them with poached or fried eggs and a side of sautéed spinach or roasted asparagus. Drizzle everything with a little hot sauce or hollandaise for next-level weekend vibes.
5| Dunk & Dip Situation: Serve a platter of warm fritters with an assortment of dips! Try cooling cucumber-yogurt sauce, spicy sriracha mayo, marinara for an Italian twist, or even a quick avocado crema.
6| Light & Fresh Lunch: Place one fritter on top of a bed of crisp romaine or massaged kale. Add cucumber, radishes, and a sprinkle of feta. It’s a protein-packed salad that doesn’t feel like “just a salad.”
7| The “Meal Prep” Plate: Pack 2-3 fritters in a container with steamed green beans and roasted sweet potato wedges. They reheat beautifully for a ready-made lunch all week.
8| Kid-Friendly Fun: Serve the fritters cut into strips or small pieces with ketchup, applesauce, or a mild ranch for dipping. Pair with oven-baked potato wedges or apple slices.
9| Fancy Appetizer: Make them extra small (about a teaspoon each), cook until golden, and spear each with a toothpick. Serve on a platter with a lemony aioli for a crowd-pleasing party starter.
Pro Tip: No matter how you serve them, a squeeze of fresh lemon juice right at the end brightens up all the flavors beautifully! Enjoy getting creative with your plate.
Try my Spinach and Feta Tortilla recipe.
Storage and Reheating Tips for Fritter Happiness
Want to keep your fritters tasting fresh, crispy, and delicious even days later? Here’s how to store and reheat them like a pro.
1| Let Them Cool Completely First. Never store warm fritters. Spread them out on a plate or rack and let them come to room temperature to avoid soggy condensation.
2| Fridge Storage (Up to 4 Days): Store cooled fritters in a single layer in an airtight container. Place a paper towel on the bottom and top to absorb any extra moisture. If stacking, separate layers with parchment paper.
3| Freezer Storage (Up to 3 Months): This is a meal-prep game-changer! Place cooled fritters in a single layer on a parchment-lined baking sheet. Freeze solid (about 1-2 hours), then transfer to a freezer bag or airtight container. Remove as much air as possible. Label with the date!
4| Best Reheating Method: Air Fryer or Oven. Want that crispy crust back? Reheat in an air fryer at 375°F (190°C) for 5-7 minutes, flipping halfway. No air fryer? Use a toaster oven or regular oven at 375°F on a baking sheet for about 10 minutes.
5| Skillet Reheat (Quick & Easy): Warm a non-stick skillet over medium heat with a tiny drizzle of oil. Add fritters and heat for 2-3 minutes per side, until hot and crispy again.
6| Avoid the Microwave If Possible. The microwave will make them soft and soggy. If you’re in a rush, microwave for 30 seconds, then finish in a hot skillet for 1 minute to crisp up the outside.
7| Reheating From Frozen: No need to thaw! Place frozen fritters directly in the air fryer or oven and add a few extra minutes to the reheating time, until hot all the way through.
8| Repurpose Leftovers! Crumble leftover fritters into a breakfast scramble, chop them up for a hearty salad topping, or stuff them into a warm pita with veggies and sauce for a whole new meal.
Pro Tip: For meal prep, freeze the uncooked patties, too! Layer them with parchment in a container. Thaw in the fridge overnight before cooking as usual. Fresh fritters on demand! 🧊→🔥
Try my Arugula, Strawberry and Avocado Steak Salad recipe.
Final Thoughts
And that’s all it takes! I hope these fritters find a happy spot in your weeknight rotation like they have in mine. They’re the kind of simple, satisfying food that just makes life a little easier. Give the recipe a try, tweak it with your favorite flavors, and most importantly enjoy every crispy, juicy bite. Thanks for cooking with me, and I’ll catch you in the next one.
Recipe Card
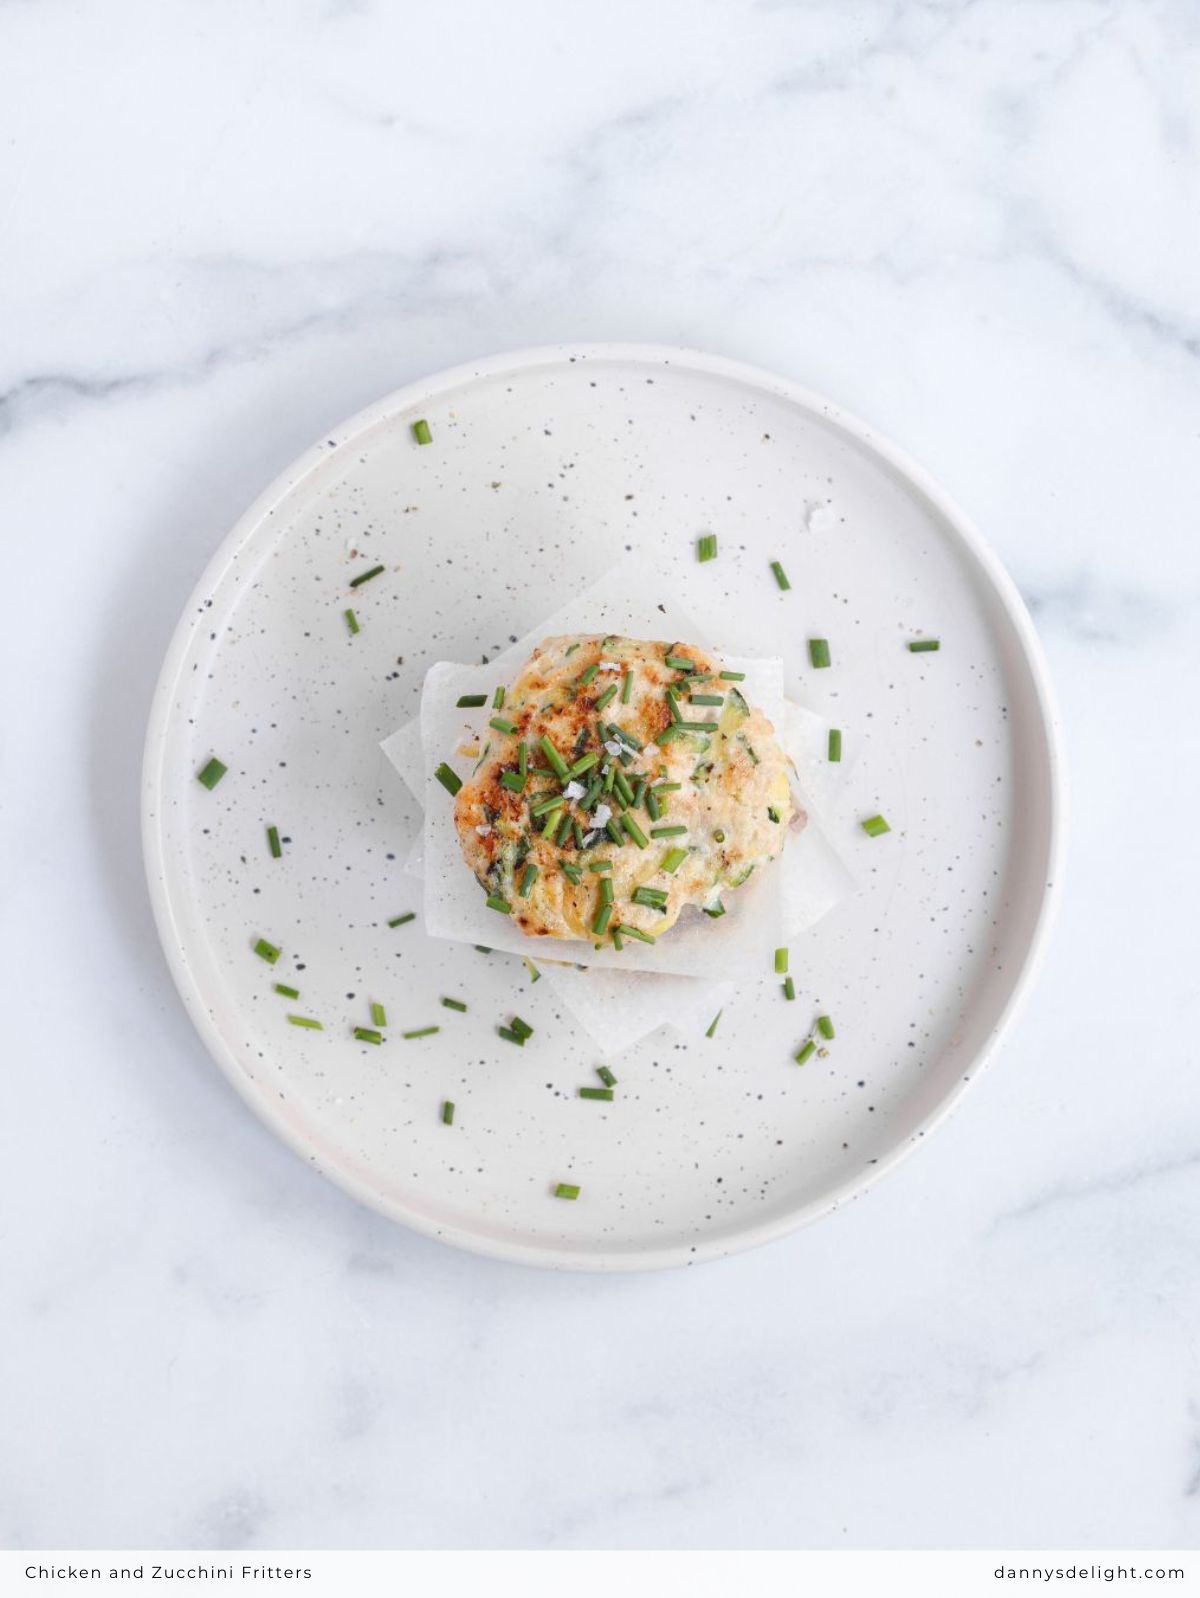
Chicken and Zucchini Fritters
My favorite trick for juicy, flavorful chicken fritters? Adding ricotta! These easy zucchini fritters are crispy outside, soft inside, and perfect for a simple, satisfying meal in no time.

Ingredients
Instructions
-
Prepare the Zucchini:
Place the grated zucchini in a colander or a bowl. Evenly distribute 1 teaspoon of salt over the zucchini and allow it to rest for 10 minutes. Using your hands or a clean kitchen towel, firmly squeeze the zucchini to extract as much liquid as possible. Discard the expressed liquid.
-
Combine Ingredients:
In a large mixing bowl, combine the drained zucchini, ground poultry, remaining 1 teaspoon of salt, black pepper (to taste), sliced green onions, egg, minced garlic, and ricotta cheese. Mix thoroughly using a fork or your hands until all components are uniformly incorporated.
-
Form the Patties:
Using a heaped tablespoon as a measure, portion the mixture. Gently shape each portion into a patty approximately ⅓ inch (1 cm) in thickness.
-
Cook the Fritters:
Heat a large non-stick skillet over medium heat. Add 1 tablespoon of olive oil to the skillet. Place the formed patties into the skillet, ensuring they are not touching. Cook, uncovered, for 3 minutes, or until a deep golden-brown crust forms on the bottom. Carefully flip each fritter. Cover the skillet with a lid and continue to cook for an additional 3–4 minutes, or until the patties are fully cooked through and firm to the touch.
-
Repeat:
Transfer the cooked fritters to a serving plate. Repeat the cooking process with the remaining mixture, adding 1 tablespoon of oil to the skillet for each subsequent batch.
Nutrition Facts
Servings 4
- Amount Per Serving
- Calories 360kcal
- % Daily Value *
- Total Fat 25g39%
- Total Carbohydrate 6g2%
- Protein 28g57%
* Percent Daily Values are based on a 2,000 calorie diet. Your daily value may be higher or lower depending on your calorie needs.


