
So, picture this: it’s one of those nights where you’re staring into the fridge, your stomach is doing the grumbly symphony thing, and you need something good, fast. Let me introduce you to my secret weapon: Kai Jeow. This isn’t your average fluffy diner omelet. We’re talking about a seriously crispy, savory, Thai street food staple that’s packed with flavor and ready in about the time it takes to boil water. I make this at least once a week, and honestly, it’s a lifesaver. Grab a bowl and a fork, friends we’re about to make the easiest, most satisfying 10-minute dinner you’ve ever had.
Try my Cottage Cheese Protein Omelet recipe.
Why You’ll Love This Recipe
Think of this as the superhero of quick meals. Here’s why it’s about to become your new go-to:
→ 10 Minutes, Start to Eat. Seriously. It’s faster than waiting for delivery and way more satisfying.
→ The Crispy Edge is Everything. We’re aiming for those lacy, golden, crunchy edges. It’s the textural magic that makes every bite incredible.
→ Humble Ingredients, Big Flavor. With just eggs and a few pantry staples, you create something savory, slightly sweet, and with a gentle kick. It’s a flavor punch way above its weight class.
→ Infinitely Customizable. Not a fan of spice? Skip the chili. Want more crunch? Toss in some minced shallot. This recipe is a perfect, forgiving template.
→ Comfort Food, Uncomplicated. There’s something deeply satisfying about a perfectly cooked egg dish. It’s warm, hearty, and just makes you feel good.
In short: It’s easy, fast, crunchy, flavorful, and totally dependable. What’s not to love?
Try my Potato Cheese Omelet recipe.
What You’ll Need To Make
Don’t let the short ingredient list fool you each one plays a starring role in creating that classic Thai omelet flavor. Here’s the breakdown:
→ Eggs: The main event! Using 3 large eggs gives you the perfect balance enough to create a hearty, foldable omelet with those amazing crispy, puffy edges we’re after.
→ Fish Sauce: This is your flavor secret weapon. Don’t be shy! 2 teaspoons of good fish sauce (like Tiparos or Red Boat) adds that deep, savory, umami backbone. It’s what makes it taste authentically Thai, not just salty.
→ Coconut Sugar: A tiny bit (¼ teaspoon) of mellow coconut sugar is the magic trick. It doesn’t make the omelet sweet; it just perfectly balances the saltiness of the fish sauce and rounds out all the flavors.
→ The Aromatics: This is where the freshness comes in! One minced green onion adds a mild bite and pop of color. Half a minced Thai chili brings the heat adjust this to your taste, or skip it if you’re sensitive to spice. They cook right into the egg, infusing every bite.
→ The Oil: While not in the mixing bowl, using a good amount of neutral oil (about 1 tablespoon) in a hot pan is non-negotiable. It’s what fries the edges and creates that incredible, lacy, crispy texture that makes this omelet so special.
The Short Story: It’s a simple team of ingredients where each one has a very specific, delicious job. Trust the process!
NOTE: For measurements and rest of the ingredients check the recipe card below.
What You’ll Need To Do
Time required: 10 mins Serves: 1
Alright, let’s get cracking (pun totally intended). This comes together in a flash!
1| The Whisk & Mix: Grab a bowl and crack in your 3 eggs. Add the fish sauce, coconut sugar, minced green onion, chili, and a little pinch of black pepper. Now, whisk it all up like you mean it! You want it bubbly and totally combined.
2| The Sizzle & Swirl: Place your nonstick skillet over medium-high heat and let it get nice and hot. Add a generous glug of oil (about a tablespoon). Once the oil is shimmering carefully! pour in your egg mixture. It should sizzle and puff up at the edges immediately. Let it cook for about 2-3 minutes, using your spatula to gently push the cooked edges inward and tilt the pan so the runny egg fills the space. You’re building those gorgeous, crispy, lacy edges!
3| The Flip (You’ve Got This!): Once the top is mostly set and the bottom is a beautiful golden brown, it’s flip time! Channel your inner street food chef. Slide the omelet onto a plate, place the pan upside-down over it, and in one confident motion, flip the whole thing over. Cook for just another 30 seconds to a minute on the second side, until it’s just set. No need to overcook it!
4| Serve & Devour: Slide your masterpiece onto a plate. For the full experience, serve it with a few fresh slices of cucumber, extra sliced chili, and a sprinkle of green onion on the side. It’s the perfect, simple plate of comfort. Enjoy
 2")
- Glycemic Index (GI): Very Low (~10-15)
- Glycemic Load (GL): Very Low (~0.5)
Get Free Cookbooks
 3")
Kickstart your keto journey with our FREE Keto Cookbooks! 🎉 Packed with delicious recipes, these print copies are yours for the taking. Don’t wait – order now and start cooking your way to a healthier you! 🚀📚
*Hurry! offer valid till stock lasts.
Easy Ingredient Swaps
No Thai chili or fish sauce? No problem. This recipe is wonderfully flexible. Here are some simple swaps to try:
For the Chili: 🌶️
- Swap with: A pinch of crushed red pepper flakes, a few dashes of sriracha (mix it right into the eggs), or a little minced jalapeño for a different kind of heat.
For the Fish Sauce: 🐟
- Vegetarian Swap: Use soy sauce or tamari (start with 1 ½ tsp, then taste and adjust). For a soy-free option, coconut aminos work great.
- Saltier Swap: In a real pinch, just use a big pinch of sea salt, though you’ll miss the complex umami.
For the Coconut Sugar: 🍯
- Swap with: A tiny pinch of brown sugar, white sugar, or even a drop of maple syrup or honey. The goal is just a hint of sweetness to balance.
Mix-In Ideas (Add a Handful): 🧅
- For more crunch: Thinly sliced shallots or red onion.
- For more herbiness: Chopped cilantro or Thai basil.
- For a protein boost: A little cooked ground pork, chicken, or shrimp.
For the Oil:
- Neutral is best, but you can use avocado oil, canola oil, or vegetable oil. Peanut oil will add a subtle, authentic Thai flavor.
The main rule is this: keep the egg ratio the same, and feel free to play with the flavors. It’s hard to mess this one up!
Try my Tortang Giniling (Filipino Beef Omelet) recipe.
Twist and Tweak Ideas
Mastered the basic recipe? Awesome. Now let’s play! Here are some easy and delicious ways to mix things up.
1. The Fluffy Cloud – For an even puffier, diner-style omelet, separate your egg whites and yolks. Whip the whites to soft peaks, then gently fold them back into the yolks (with the other ingredients) just before cooking. It’s a game-changer for texture.
2. The “Everything But The Kitchen Sink” – Make it a full meal by stirring in a big handful of cooked, minced protein before pouring it into the pan. Think: leftover chopped chicken, pork, shrimp, or crumbled tofu. A little finely chopped cabbage or bean sprouts adds great crunch, too.
3. The Herb Bomb – Love fresh herbs? Me too. Stir in a small handful of chopped fresh cilantro, Thai basil, or mint (or all three!) with the green onion for a super fragrant and vibrant version.
4. The Sweet & Tangy Dip – Serve it with a quick dipping sauce instead of just fish sauce. Mix 1 tbsp lime juice, 1 tbsp fish sauce, 1 tsp sugar, and some minced chili and garlic. It cuts through the richness perfectly.
5. The Crispiest Edges Ever – For maximum crispiness, use a very small pan (like a 6-inch) for a single omelet. This makes it thicker, with a higher ratio of glorious fried edge to soft center. It’s the street vendor’s secret!
6. The Moo Sab Style – This is a classic Thai favorite. Sauté 2-3 tbsp of finely ground pork with a clove of minced garlic until cooked through, then pour the egg mixture right over it in the pan. Hearty and so flavorful.
The best part? You can mix, match, and invent your own signature version. Once you know the basic technique, the sky’s the limit. Have fun with it!
Try my Sweet Potato Spanish Omelet recipe.
Pro Tips for the Perfect Omelet 🍳
These little tricks make all the difference between a good omelet and a great one. Bookmark this section!
1| Oil Temperature is Key. Your pan and oil need to be properly hot before the eggs hit it. You should see the oil shimmering and lightly smoking. This immediate sizzle is what creates those iconic lacy, crispy edges.
2| Don’t Skimp on the Oil. This isn’t the time for a light mist. Use a full tablespoon of a neutral, high-heat oil (like vegetable or canola). The eggs should almost shallow-fry for the best texture.
3| Whisk with Enthusiasm. Get some air into those eggs! A vigorous whisk until the mixture is frothy helps create a lighter, slightly puffier texture.
4| The Non-Negotiable Pan. A good nonstick skillet is your best friend here. It ensures your crispy masterpiece will flip and slide out onto the plate beautifully without sticking.
5| Resist the Urge to Stir. Once you pour the eggs in, let them set for about 10 seconds to form a base. Then, gently push the edges in don’t scramble them! You’re guiding the runny egg to the hot pan, not mixing it all up.
6| The Confidence Flip. The flip can be intimidating. If you’re not ready to toss it in the air, use a plate: slide the omelet onto a plate, place the pan upside-down over it, and flip the whole thing over. It’s foolproof!
7| Serve Immediately. Kai Jeow is at its absolute peak the second it leaves the pan. The contrast between the crispy exterior and tender interior is what it’s all about, so get it to the table fast!
Remember: A hot pan, enough oil, and a fearless flip are the holy trinity for Thai omelet success. You’ve got this
Try my Omelet With Cottage Cheese and Basil recipe.
 4")
Budget-Friendly Tips
This recipe is already super affordable, but here’s how to make it even kinder to your wallet:
1| Egg-Cellent Savings: Buy eggs in larger cartons (18 or 24 packs). The cost per egg is almost always cheaper, and they keep for weeks.
2| Green Onion Regrowth: Place the white root ends of your green onions in a glass with an inch of water on a sunny windowsill. They’ll regrow in days, giving you a nearly endless (and free!) supply for garnishes.
3| Chili Swap: If fresh Thai chilies are hard to find or pricey, use a small pinch of crushed red pepper flakes from your spice rack. A little goes a long way!
4| Fish Sauce Goes Far: A standard bottle of fish sauce costs a few dollars but lasts for dozens of recipes. It’s a great long-term investment for adding big flavor to simple dishes.
5| Skip the Specialty Sugar: While coconut sugar is nice, an equal pinch of plain white or brown sugar works perfectly fine for balancing flavors and costs pennies.
6| Bulk Aromatics: If a recipe only uses half a chili or one green onion, plan another meal that week using the rest (like a stir-fry, soup, or fried rice) to ensure nothing goes to waste.
7| Simple Sides: Serve with steamed jasmine rice and simple cucumber slices. These are incredibly affordable staples that make the meal more filling without adding significant cost.
8| Oil Wisely: Use a neutral, affordable oil like vegetable or canola oil. There’s no need for expensive olive oil here, as its flavor can be overpowering for this dish.
The bottom line: This recipe is a budget hero as-is. With a couple of smart shopping habits, you can make it a regular, delicious part of your meal rotation for just dollars a week.
Try my Creamy Avocado Toast with Garlic Mushrooms recipe.
Serving Ideas
This omelet is incredibly versatile. Here are some of my favorite ways to plate it up!
The Classic Thai Way (My Go-To)
- Serve it over a big, fluffy mound of steamed jasmine rice.
- Add a few slices of cool, fresh cucumber and extra sliced chili on the side.
- Drizzle a little more fish sauce or Sriracha on top. Perfection in 5 minutes.
For a Light & Fresh Meal
- Place it on top of a big bed of lettuce or shredded cabbage for a crunchy salad base.
- Drizzle with a simple lime vinaigrette (lime juice, fish sauce, sugar, water).
- Garnish with lots of fresh herbs like cilantro and mint.
The Ultimate Comfort Bowl
- Add it to a bowl with rice, a simple broth or soup, and some steamed veggies (like bok choy or broccoli).
- Think of it as the protein-packed star of a nourishing bowl.
As a Shareable Appetizer or Snack
- Let it cool slightly and slice it into strips or wedges.
- Serve with a quick sweet chili dipping sauce or the lime-chili-fish sauce dip mentioned earlier.
- Great for parties or a fun snack!
The Next-Day Hack (Yes, It Works!)
- Leftover omelet? Crumble it over fried rice or noodle dishes the next day for an instant flavor and protein boost.
- You can also tuck slices into a banh mi-style sandwich with pickled veggies, mayo, and herbs.
My #1 Tip: No matter how you serve it, eat it right away while the edges are still magically crispy!
Try my Avo Feta Toast recipe.
How to Store & Reheat Leftovers (If You Have Any!)
Let’s be real this omelet is best devoured hot and crispy, right out of the pan. But if you do have a piece left, here’s how to handle it.
Storing It:
- Let the omelet cool completely to room temperature (about 15-20 minutes).
- Wrap it tightly in plastic wrap or place it in an airtight container.
- Store it in the refrigerator for up to 2 days.
Reheating for Best Results:
The goal is to revive the crispness! The microwave will make it rubbery.
- Skillet Method (Recommended): Reheat it in a dry nonstick skillet over medium heat for 1-2 minutes per side. This helps re-crisp the edges.
- Air Fryer/Toaster Oven: Place it on the rack at 350°F for 2-3 minutes until hot and the exterior crisps back up.
- Avoid the Microwave if you can it will steam the omelet and make the texture soft and soggy.
A Note on Freezing:
I don’t recommend freezing Kai Jeow. The eggs become watery and the texture turns very spongy and rubbery upon thawing. It’s a true “cook and eat” dish.
Pro Tip: If you know you’ll have leftovers, slightly undercook the second side. It will finish cooking when you reheat it, helping it stay tender.
Try my Mango Peanut Butter Breakfast Wrap recipe.
Final Thoughts
And there you have it my go-to recipe for turning a few simple ingredients into a plate of pure comfort. I hope this Kai Jeow becomes a trusted quick-fix in your kitchen, just like it is in mine. Give one of the fun twists a shot next time, and make it your own. If you whip this up, I’d love to hear how it turned out for you! Now, go enjoy that perfectly crispy, golden masterpiece. You’ve earned it. Happy cooking.
Recipe Card
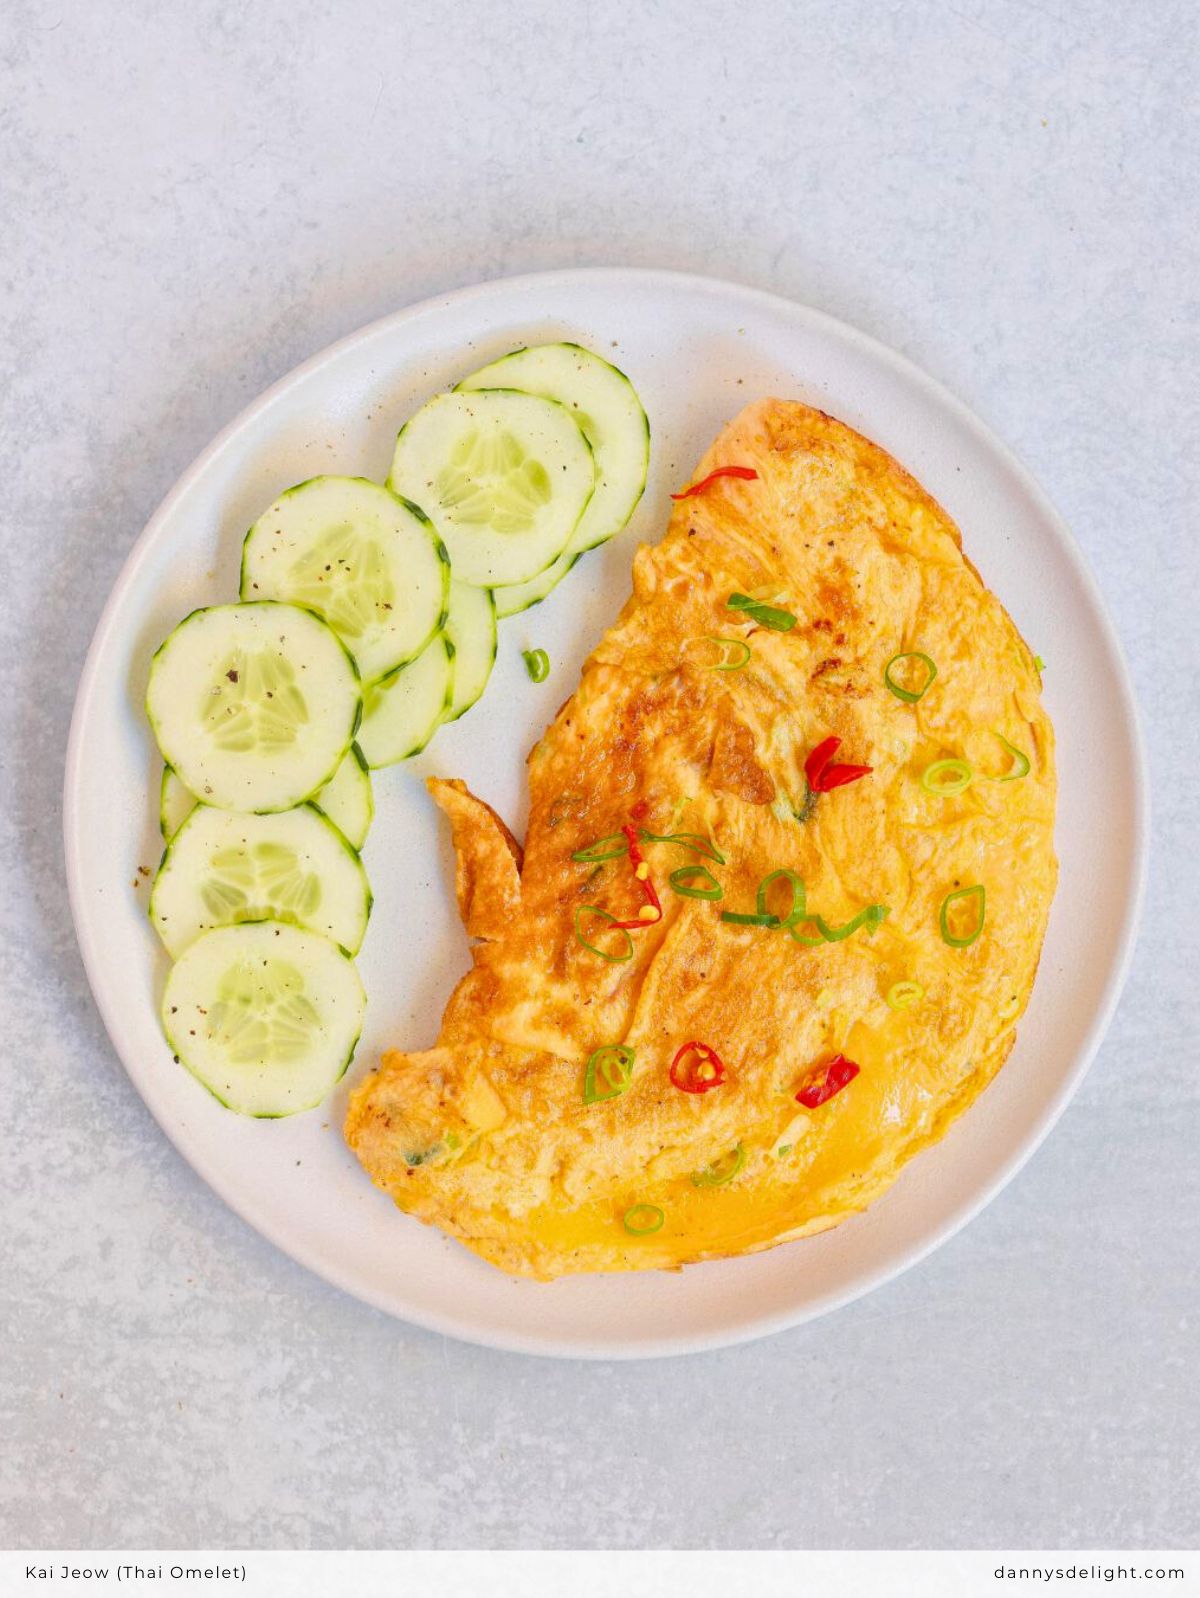
Kai Jeow (Thai Omelete)
My go-to recipe for a seriously crispy Thai-style omelet with fish sauce and chili. Ready in under 10 minutes and packed with flavor. Your new easy dinner hero! 😋
 5")
Ingredients
Instructions
-
Prepare the Egg Mixture:
In a medium mixing bowl, thoroughly whisk together 3 large eggs, 2 teaspoons fish sauce, ¼ teaspoon coconut sugar, the minced green onion, and the minced Thai chili until fully combined and slightly frothy.
-
Cook the Omelet:
Heat 1 tablespoon of neutral cooking oil (such as vegetable or canola oil) in an 8-inch nonstick skillet over medium-high heat. Once the oil shimmers, pour in the egg mixture. Allow it to cook undisturbed for approximately 10 seconds to set the edges. Using a spatula, gently push the cooked edges toward the center and tilt the pan to distribute the uncooked egg. Continue this process for 2–3 minutes until the bottom is deep golden brown and crisp, and the top is mostly set but still slightly moist.
-
Flip and Finish:
Carefully slide the spatula under the omelet and flip it over in one swift motion. Alternatively, you may invert it onto a plate and slide it back into the pan. Cook the second side for an additional 30–60 seconds, just until set.
-
Serve:
Transfer the finished omelet to a serving plate. If desired, garnish with additional sliced green onion and fresh chili. Serve immediately, traditionally with cucumber slices and steamed jasmine rice on the side.

Nutrition Facts
Servings 1
- Amount Per Serving
- Calories 270kcal
- % Daily Value *
- Total Fat 22g34%
- Sodium 900mg38%
- Total Carbohydrate 2g1%
- Dietary Fiber 0.3g2%
- Sugars 1.5g
- Protein 18g36%
* Percent Daily Values are based on a 2,000 calorie diet. Your daily value may be higher or lower depending on your calorie needs.


